

lallouss
-
Posts
3714 -
Joined
-
Last visited
-
Days Won
13
Posts posted by lallouss
-
-
7 hours ago, Zurp said:
Huh? Weak against rangers, hunters and reapers? I really don't have any difficulties against them.
i was considering like if both has same power and same level of play, otherwise if your pro ya i think you can beat them, but if they are smart they would kill your cat with their dps, i have to give bm a weakness or else they gona nerf it
 jejeje
7 hours ago, Zurp said:
jejeje
7 hours ago, Zurp said:6. Weaker in big fights
ya i meant, more useful smaller fights, but your right bm is not weak in big fights ill update it after contest and put: less useful in big fights and ty

-
nice charmer guide bro but i think u should post this in Russian section
-
completed 100%

-
70% completed
my neck hurts from the amount of pics n vids edited
-
2 hours ago, Dr Strange said:

gg wp

-
On 3/10/2023 at 9:12 AM, Drakoknight said:
Thank you. This was a pain to do as it kept clearing by accident
exhausting , nice guide we need more dk guides
-
i like the kitty style xd niceee
-
great use of editing gl
-
blade dancer guide: hit hit hp pot hit hit xD jk gg bro
- SeaDemon, Shadowmon and Drakoslayd
-
 3
3
-
-
very gd detailed guide maybe the best so far ive seen in this contest
-
i like it simple and clean gg
-
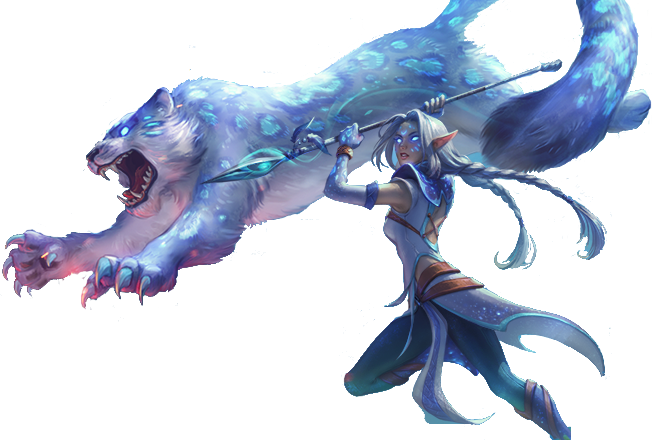
The Beast 🐅
1. Introduction
2. Base, Expert Skill, Talents and Relics Setup
3. Weapons, Gears and Books
4. PvP, Arena and Wars Tips and Tricks
5. PvE, Dungeons and Raids Tips and Tricks
6. Recommended items and minions
7. Summary
1. Introduction:


 SpoilerAttack
Defense
Support
Difficulty
Spoiler
SpoilerAttack
Defense
Support
Difficulty
SpoilerSentinel side always lacked the hero that can tame minions or pets thus Beast Master was introduced the newly born class not many yet play or know how to play so follow this guide carefully and you can become also a Beast urself, he's known for his moon sided pet but combined together they form a formidable threat to enemies all over Arinar.
Most used expert skill Proximity to Nature

Least used expert skill Return to the Roots

 Firstborn passive: +2% max hp +4% physical and magical damage
 Can equip staves
  Can equip two-handed axes
 Can equip spears
  Can equip two-handed swords
 Can equip two-handed maces
 Can equip Cloth armor
  Can equip Light armor
Best of both worlds Beast Master can be a support or a damage dealer with his Moon partner, achieving highest magic damage possible and while having pro damage stats, he can support his party and team mates with his aoe heal skill Proximity to Nature and has a wide crowd control skill Forest Symbol that roots enemies to the ground, now we will dive deep into the more important stuff.
Pros:
1. Evades battles while Moon engages in most fights
2. AoE Heal + buff
3. AoE Root
4. Teleport unlimited across the map using Talent

5. Unlike Druid, Templar, Charmer, his minion doesn't disappear if not killed
6. 2 possible damage output (Player + Moon)
7. Strong vs non damage dealer classes
8. Can be a damage dealer himself or a support
9. Stronger in small fights
Cons:
1. No AoE damage except for

2. If Beast Master dies, Moon will die also unlike Druid, Templar, Charmer they stay alive even if caster died
3. Limited distance for Moon attack radius
4. Weak vs high damage dealer classes
5. Not easy to play, many skills to be casted
6. Weaker in big fights
Strong against:


Weak against:


2. Base, Expert Skill, Talents and Relics Setup:

Pure PvP
Arena, 1v1, War, GvG and anything related to versus players
Base skills:
 Moon Touch 1/5
Magic based damage spell that also increases Moon damage by 5-15% from 1-5 level
Tip1: Use it while Moon attacking your target
Tip2: use it whenever it possible to activate your relics, 3rd relic essential in pvp to make you cast your Moon Touch more than once back to back
Tip3: +5% dmg from Talent 1/1

Relics:


 Beast Awakening 5/5
Summons Moon monster that has the following stats of the player: (at lvl5)
130% of his base hp
130% of his physical/magic defence
110% of his physical damage | 75% of his magic damage
Receives all stats from player except for:


Tip1: use it 5 seconds before engaging in a pvp battle, to make your relics effect last enough when meeting enemies
Tip2: don't use % items that increases your hp, the hp of Moon is dependent on your base hp
Tip3: whenever u want escape thru monsters or enemies make sure they hit u, and u keep running, Moon will auto attack anyone who hits you
Relics:


 Order to Attack 1/5
Force Moon to attack any target u desire faster + increase damage for 1st hit, Moon will keep attack the target for up to 10sec at lvl1 up to 12 yards from yourself
Tip1: use it to redirect you attack on low hp enemies to finish them off
Tip2: use it to stop enemies from running away
Tip3: use it and run away up to 12yards before moon returns to you
Relics:


 Healing 3/5
If Moon is active it will heal him, if Moon not active it will heal yourself
Its 2 types of heals 1st instant based on the % of max hp 2nd is based on % of your magic power ( 4 tics, once each 3sec for 12sec)
Tip1: Use it constantly whenever your Moon is in battle with enemies and his hp is below 80%
Tip2: Use it constantly to activate the 3 relics that gives you heal boost
Relics:


 Chain Lightning 5/5
One of the best chain stun + damage to enemies, at lvl5 dealing 95% of physical or 160% of magic depending on which is higher with 5.5sec stun, if successful will retarget at 2yards with a -10% damage up to 6 enemies or 10 monsters
Tip1: engage your fight with this spell to have advantage on your enemies
Tip2: 5.5sec stun without relics effect or talent, but if lucky it can reach up to 9-10sec wi
Tip3: multiple target debuff relic effect on enemies, multiple chance buff relic effect on self
Tip4: increase +1sec stun duration with Talent 3/3

Tip5: 50% chance to deal the stun debuff on the chained enemies -15% stun time per additional target with Talent 1/1

Relics:


make sure you use only 10 skill points on base skills leave other points for expert skills
Expert skills:
 Bestial Rampage 4/4 ( buff on Moon )
Increase dmg, speed and gives u heal each time Moon deals damage
Tip1: use it only when Moon is attacking a target
Tip2: use it whenever its ready
 Soul Connection 1/4 ( passive )
Not useful to level it but its a good passive skill to have, decreases dmg received depending on Moon missing hp + heals you each time Moon recovers a % of his hp
 Forest Symbol 1/4 ( debuff on enemies | root )
Multi root your enemies with a single click! stop your enemies from escaping and reduce their attack speed by abit
Tip1: use it whenever enemies trying to run away
Tip2: use it to get distance between yourself and your enemies to get higher chance of survival let your Moon do the dirty work
Tip3: increase duration +1sec with Talent 1/1

 Double Concentration 1/4 ( buff on Moon )
Buff your Moon with Double Concentration whenever he deals a successful auto attack you will receive a:
4% of cd + 2% critic dmg + 2% critic heal up to x4 stacks (Max total buffs: 16%cd 8%critic dmg 8% critic heal)
if no Moon available you will just receive a 15% cd
Tip1: this skill is mostly for pve usage but it adds some buffs to yourself thus also your Moon so its useful to use it whenever possible
 Moonlight 1/4 ( debuff on enemies | slow + magic dmg )
Slow your enemies down from reaching or trying to escape from you + deal extra magic dmg each time Moon hits them
Tip1: 2nd most unused skill in a pvp scenario no time to use it much as other skills are more important
Tip2: u can max it out 4/4 for 1v1 but in an overall scenario in GvG and big battles not effective
Aura of the Forest 4/4 ( aoe magic dmg on Moon )
Most useful aoe damage skill you can have, either on yourself or your Moon, dealing up to 110% magic dmg each 2sec for 10sec + 4% per hit Moon receives up to x5 stacks + 15% extra from talent
 (total max dmg: 145%/2sec)
 Blessing of the Moon 3/4 ( buff on yourself or ally )
Increases 13% Critical hit and 7% Penetration at lvl3 this is as much effective as lvl4 not much difference at lvl4 +2% critic +1% pene
Tip1: use it on yourself so Moon can also receive the buff from your stats
Tip2: your Moon will receive x2 buff if using Talent

Tip3: at 3/4 u can cycle it and Moon will still receive the x2 buff even with the -8sec from talent
 Return to the Roots 1/4 ( buff on Moon )
Probably the most unused skill for the Beast Master, this skill makes the Moon return to you with invincibility buff on him +25% movement speed
Tip1: use it when Moon is low hp and you cant heal it so it doesnt die ( delay its death )
Tip2: if no Moon active than use it to give yourself a boost of movement speed
Tip3: when u become pro and notice it also removes debuffs on the moon and yourself, good skill for pro arena fighters
Tip4: u can do cool stuff with it with Talent
using it while this Talent is active, jumps your character to Moon and gives him 100% resist for 6sec + increased movement speed, use this if enemies are trying to escape and they stun or disable Moon 
 Proximity to Nature 4/4 ( aoe Heal )
1 of each 6 seconds aoe Heal 51% of your magic to 9 allies within 3 yards + heal Moon wherever its location is on map, also 25% physical/magical defence and gives you immunity to all attacks and prevents you from moving or attacking or casting spells or using any items
Tip1: most used heal skill in massive battles or even small battles
Tip2: u can keep your distance from your enemies while healing Moon
Tip3: +6% more heals with Talent 3/3

Pure PvE
Dungeons, Questing, Raid Bosses anything related to farming
Base skills:
Moon Touch 5/5
lvl5 needed in PvE for maximum output of damage overall
Tip1: use the skill as much as possible to activate the poison and multi relics
Relics:


 Beast Awakening 5/5
lvl5 is a must same in PvP to get the most of your Moon
Tip1: whenever u want escape thru monsters or enemies make sure they hit u, and u keep running, Moon will auto attack anyone who hits you
Tip2: if fighting a boss try get your relic
 active than let boss hit u 1st so he becomes -20%hp ( this is helpful vs high hp bosses, if anything above 700khp+ at lvl32 or else becomes waste of time to try activate ur relic )
Relics:
 Order to Attack 1/5 or 3/5
if you got high defence and hp and survivability than put it 3/5 if in not need the Healing to be 3/5 all depends on your stats and power of survival of your Moon
Tip1: if fighting a boss try get your relic
active than let boss hit u 1st so he becomes -20%hp, when u receive the buff on yourself you will need to off your Moon, or either make sure boss hits you with an aoe spell
Relics:

 Healing 3/5 or 1/5
Relics:

 Chain Lightning 1/5
Tip1: use it whenever many ads near each other to get a chain damage
Relics:


make sure you use only 10 skill points on base skills leave other points for expert skills
Expert skills:
Bestial Rampage 4/4 ( buff on Moon )
level4 is a must for maximum buffs
Tip1: same as PvP
Soul Connection 1/4 ( passive )
same as PvP not much usefull but not bad to acquire it because its passive
Forest Symbol 1/4 ( debuff on enemies | root )
not needed in PvE much but useful if trying to escape mobs
Double Concentration 4/4 ( buff on Moon )
Buff your Moon with Double Concentration whenever he deals a successful auto attack you will receive a:
10% of cd + 4% critic dmg + 4% critic heal up to x4 stacks (Max total buffs: 40%cd 16%critic dmg 16% critic heal)
if no Moon available you will just receive a 35% cd
Tip1: in PvE you will need focus on your stats more than combat techniques that's why this skill is a must level4
Moonlight 1/4 ( debuff on enemies | slow + magic dmg )
Slow your enemies down from reaching or trying to escape from you + deal extra magic dmg each time Moon hits them
Tip1: use it mostly vs bosses it will keep recycle each time Moon hits the boss
Aura of the Forest 1/4 ( aoe magic dmg on Moon )
not needed to be more than level1 in PvE better focus on buffs not aoe damage, its still effective at lvl1
Tip1: use it whenever Moon near bunch of monsters
Blessing of the Moon 3/4 ( buff on yourself or ally )
Tip1: same as PvP
Return to the Roots 1/4 ( buff on Moon )
Tip1: same as PvP
Proximity to Nature 3/4 ( aoe Heal )
Tip1: use it whenever you or Moon are below 60% hp
Tip2: same as PvP
3. Weapons, Gears and Books:

Pure PvP
Arena, 1v1, War, GvG and anything related to versus players
Summary: Magic | Stun | Resilience | Penetration | Resist
Weapons:
Support / Stun mode:

 Crystal: Stun
  | Rune: Retribution
(can be found in Horror event once per year or purchased from market or other players)
Damage Dealing / Heal mode:

 Crystal: Magic
  | Rune: Retribution
(can be purchased thru Arena Supplier)
Location of Arena Supplier: any main town the higher the town the higher the level gear


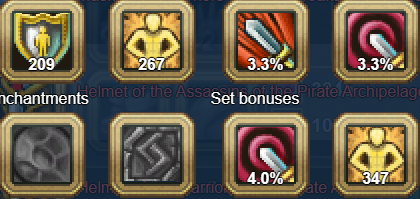
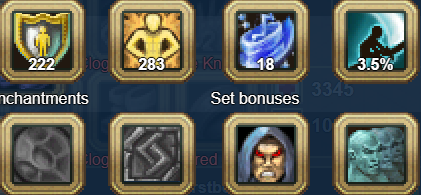
Gears: (maximize your base hp + magic + penetration ) 2 light 2 cloth
Normal: (affordable if your new to game you need gather AP)

Location: Arena Supplier

 Crystal: Cooldown
  | Rune: Resist

 Crystal: Rage
  | Rune: Resilience

 Crystal: Penetration
  | Rune: Resilience

 Crystal: Stun | Rune: Resilience

 Crystal: Mana Regeneration
  | Rune: Resilience
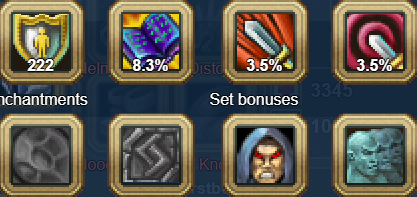
*Accessories: Only Greatness available for arena, but if you didn't gather Imperials of Greatness yet, than use PvE Accessories, check PvE section below for more info*
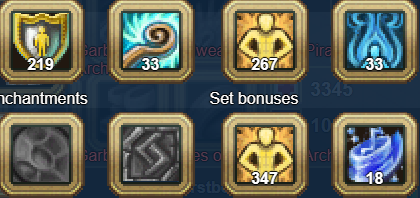
Greatness: (winning special arena ranks or daily battles will receive Imperials of Greatness)

Location: next to Arena Supplier

 Crystal: Cooldown | Rune: Resist

 Crystal: Rage | Rune: Resilience

 Crystal: Penetration | Rune: Resilience

 Crystal: Stun | Rune: Resilience

 Crystal: Mana Regeneration | Rune: Resilience
(available thru crafting process or buy thru other players)
Accessories:

 Crystal: Critic
  | Rune: Parry

 Crystal: Critic | Rune: Fortitude

 Crystal: Mana Regeneration | Rune: Fortitude
Pure PvE
Dungeons, Questing, Raid Bosses anything related to farming
Summary: Physical | High Stats
Weapons:

 Crystal: Physical
  | Rune: Retribution
(can be found in Spring event once per year or purchased from market or other players)
Underwater:

 Crystal: Bloodlust (Depth Fury)
  | Rune: Retribution
Gears: 2 light 2 cloth
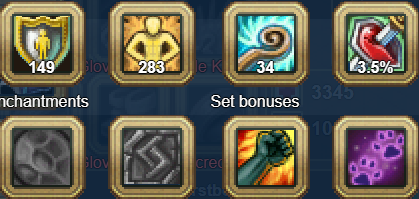
Normal: (affordable if your new to game either thru special events or dungeon or other players)

 Crystal: Cooldown | Rune: Physical Defense

 Crystal: Rage | Rune: Physical Defense

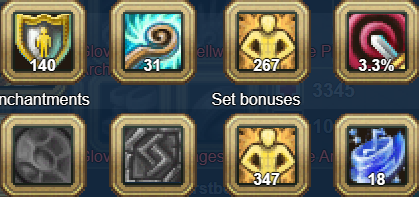 Crystal: Penetration | Rune: Physical Defense

 Crystal: Cooldown | Rune: Physical Defense
(Cheap and can be found in Sea Tramp dungeon Mythical map4 town5)

 Crystal: Mana Regeneration | Rune: Fortitude
(Belts from underwater special chest of map4 town5 or other players or market)
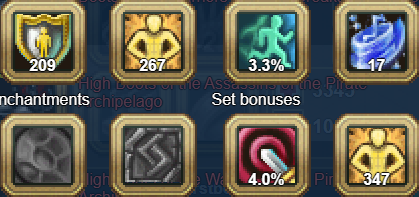
Mermen: (lvl32 set the highest most rare set of PvE found currently, can be found in mermen dungeon or other players)

 Crystal: Cooldown | Rune: Physical Defense

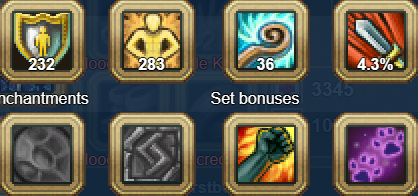 Crystal: Rage | Rune: Physical Defense

 Crystal: Penetration | Rune: Physical Defense

 Crystal: Attack Strength
  | Rune: Physical Defense

 Crystal: Mana Regeneration | Rune: Fortitude
*More expensive than normal version* (Belts from underwater special chest of map4 town5 or other players or market)
Accessories: (From special events or crafting)

 Crystal: Critic | Rune: Pierce

 Crystal: Critic | Rune: Fortitude

 Crystal: Mana Regeneration | Rune: Fortitude
Books:
Basic:


Pro:


 + Basic
Rich:


 + Pro + Basic
More info on where and how these books work from this guide made by @Phosphatase (special thank to him, leave a like on his guide)
Spoiler4. PvP, Arena and Wars Tips and Tricks:

How to play Beast Master in a PvP situation: (check description of video for the original creator of the video, sub and like his video ty)
SpoilerHow to play Beast Master in GvG or War:
Start by making sure your Moon
is active, than initiate your 1st attack from a distance using next use to trap or disable some enemies make sure to use from safe distance, use it on group of 3+ enemies, if Moon hp is below 80% use and if teammates taking much damage and need support use
Other spells to be used when available in order of importance to buff Moon:
> >>>>>
If your Moon dies, try evade fighting and focus on supporting till you can reuse
5. PvE, Dungeons and Raids Tips and Tricks:

Everything you need to know is inside this video tutorial step by step you will learn how to play beast master like a pro yourself, simplified and visualized
Spoiler6. Recommended items and minions:


Tip1: There is huge amount of buffs and minions to choose from in Warspear so will recommend the most useful ones that will help you with your journey as a Beast Master
Tip2: You have to choose buffs and minions that enhances your stats, this will make Moon stats enhanced as well
Tip3: Most buffs and minions you will acquire them in your journey or thru market
Tip4: Depending on what setup your using Physical or Magical, choose wisely and correctly the buffs
Tip5: There is a max limit on each stat so we will go thru them once so if you notice you already got max, it will be useless to use a buff of same stat
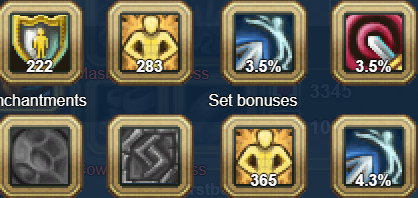
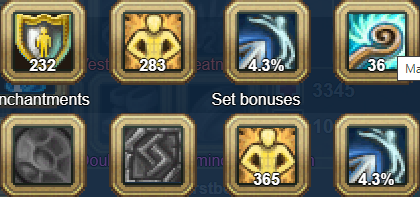
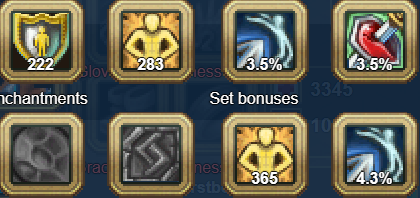
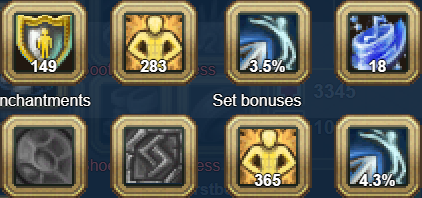
Max Stats


 80% or 25000
  no limit
 80% or 25000
  no limit
 60%
60%  50%+3%talent
 60%
60%  no limit
 30%
30%  50%
50%
 25%
25%  70%
70%
 100%
100%  50%
50%
 100%
100%  200%
200%
 50%
50%  50%
50%
 100%
100%  50%
50%
 50%
50%  50%
50%
 50%
50%  100%
100%
 no limit
  50%
50%
 50%
50%
PvP Guild Events and Arena:
Pots


Scrolls


Food


PvE Dungeon and Monsters:
Pots


Scrolls


Food
Underwater:
Pots Any from PvP or PvE
Scrolls


Food


Minions: (will mention the most important buffs only for more info on where and how, check this guide made by @PhoenixFire (special thank to him, leave a like on his guide)
SpoilerPvP Guild Events and Arena:
 never dies at 60% activates
 4sec immobilization
 charge+3sec stun chance
 +15%(passive) +15%(passive)
PvE Dungeon and Monsters:
 +15%(passive) +20%(active)
 +7%(passive) +10%(passive)
 +20%(active) +25%(active)
 +10%(active) +15%(active)
 +20%(passive) +100%(active)
 Black Tiger +30%(active) +30%(passive)
 +25%(passive)
7. Summary:
Beast Master is class on its own, non can replace it from all classes from either factions, its the only class that was a companion Moon
beside it that never dies unless killed or unsummoned.
U can focus either on supporting your team and your Moon by going with full magic build or you can focus on physical build and let your Moon deal massive pve and pvp damage to monsters and players alike.
Its not an easy class to be played its on the top5 of the hardest classes to play because of the different setup and skills he got and all must be used in battle to achieve victory.
I Recommend always checking the The Beast Guide 🐅 and if you got any questions or guidance please contact me in game at:
SpoilerZeus lvl32 paladin
or
Noname lvl32 Beast Master
Elf side US-Sapphire server
This guide is up to date of 23/3/2023 ©
-
-
-
On 3/3/2023 at 3:45 PM, Dr Strange said:

is that the Darkhold?

-
1 hour ago, Gladiator said:
International Women's Day -> Select the troll costume with the most stereotypical color for females.
Good job AIGRIND I guess..?

penetration book ( ͡° ͜ʖ ͡°)
- Kamisama and Drakoslayd
-
2
-
15 hours ago, Jack said:
Mace weapon have magic damage, please remove it. It's useless for warden. Thank you.
Dear player, your request has been accepted.
Our support team will contact you within five working days (from Monday to Friday) with a reply.
Spoiler
-
happy valentine warspear forum community
-
8 hours ago, SaltyCoffe said:
Yeah for new people map 2 is really confusing after you get to Nadir part, especially swamp where u don't know which quest to take and do
They really should make a change or put up a guide on forums
actually there is many guides on forum for everything small to big including swamp detailed guides
@Ironstand i read all and it was fun jajaja
Spoilergtfo of forum and delete warspear
thats an advice people telling u this so u dont spend all ur life on warspear and be disappointed oh oh
-
2 minutes ago, Dr Strange said:

God bless all injured in turkey and syria in earthquake today love from lebanon

- TheCaster, akansha and Dr Strange
-
 2
2
-
 1
1
-
dude was waiting the contest to start so he can click *post*
anyway gg bro amazing
- 100xp and Drakoslayd
-
2
-
-


Magic Charmer or How to Become a God of Healing
in Guides
Posted