Leaderboard
Popular Content
Showing content with the highest reputation on 04/19/21 in all areas
-
 Пора бы уже как-то менять всю эту систему. Как пример, можно было бы ввести новую валюту за прохождение ивентовых инстов. И эту же валюту можно будет менять на дроп с инста. Людей уже мало что мотивирует бегать много в инст, кроме ог. Но в плане ог есть инсты намного лучше из-за чего желание инстить падает в разы. Я не удивлюсь, если цифры по прохождению инстов в этом году значительно ниже прошлогодних. И не сказать что прямо актив уходит, нет, просто нет ничего нового, а всё что мы видим это одно и тоже, максимум в новой обёртке.5 points
 -
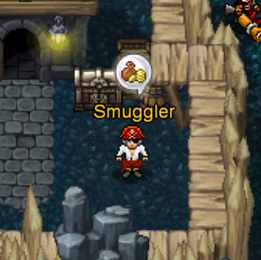
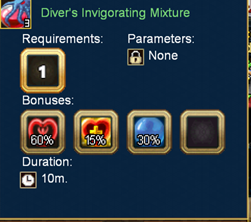
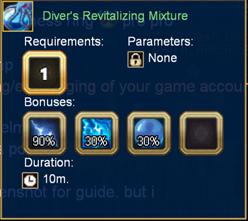
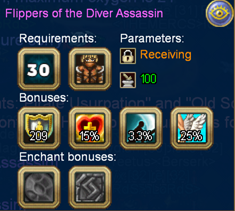
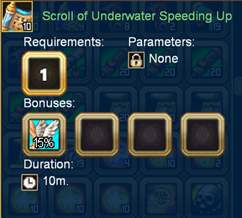
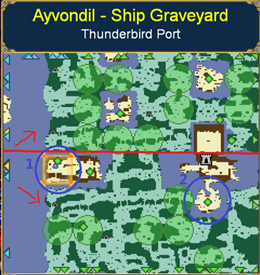
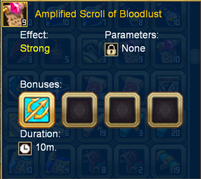
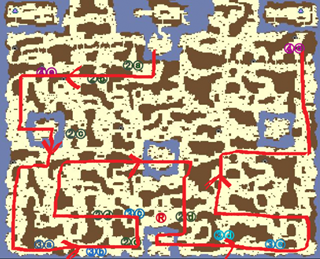
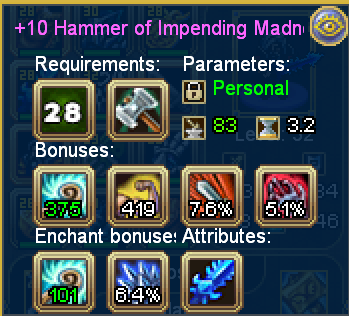
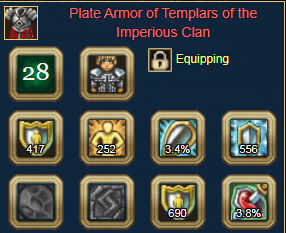
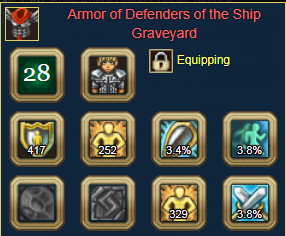
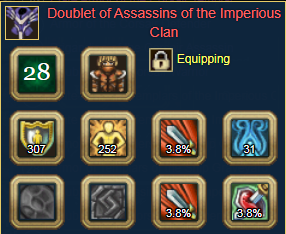
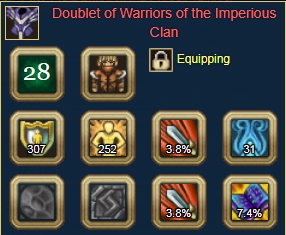
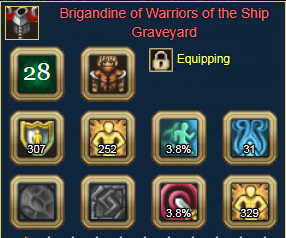
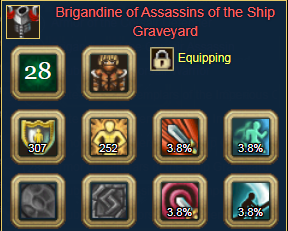
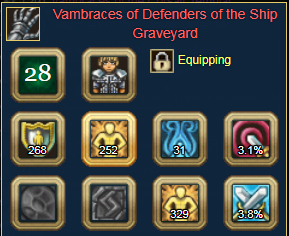
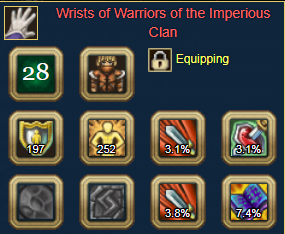
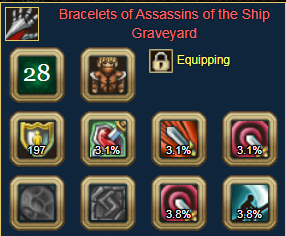
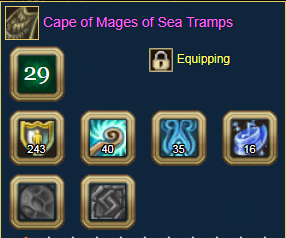
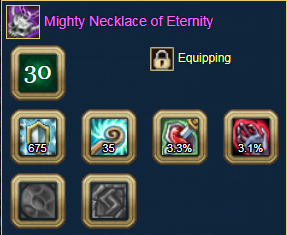
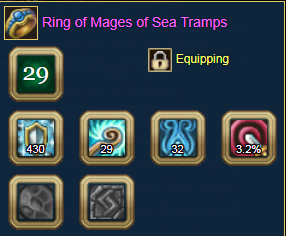
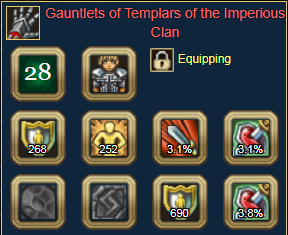
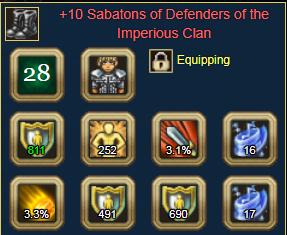
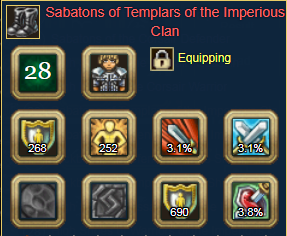
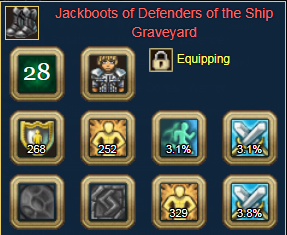
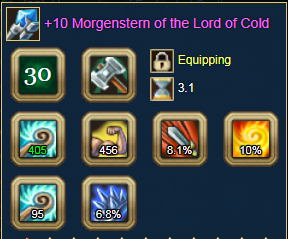
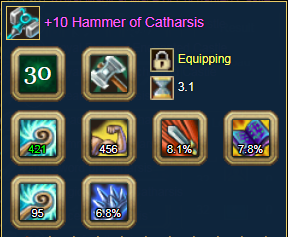
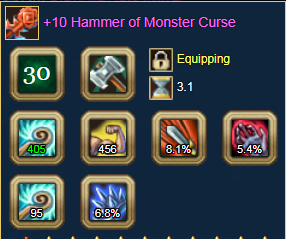
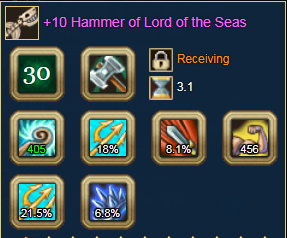
Mastering the Ship Graveyard (or simply T5) sector of Ayvondil:- Hi fellow player! Wondering why another T5 guide? While many players are already making the most of the T3 (Black Oak Forest) and T4 (Flying Islands) sectors by doing the Daily Quests and Dungeons, the T5 (Ship Graveyard) sector is still quite unpopular among many players. Why so? It is because of the initial challenges that players face in this sector. What are these challenges and how to overcome them? What are the rewards that are waiting for you in the T5 sector? How to gradually master this territory and how to quest independently in this sector? These are some of the questions this guide will attempt to help you with! Contents – 1. Preparing for T5 a. Challenge Number 1: Oxygen b. Challenge Number 2: Underwater Walking Speed c. Challenge Number 3: Fighting underwater monsters d. Your Friend Number 1: Reputation with the Mermen of Depths e. Your Friend Number 2: Talents f. Your Friend Number 3: Pirate Doubloons 2. Questing in T5 1. Preparing for T5 T5 is the most challenging and yet the most rewarding part of the game. The mobs in this sector are strong and they have control skills which makes it difficult to defeat them. Thus, it is important to enter this sector with adequate information of what can help you in your quests. Once you have finished the yellow quests in the Flying Islands (T4), you can proceed with yellow quests in T5. Once you finish some yellow quests in T5, blue quests will also begin to unlock in a phased manner. Once you have finished the yellow quest for Sea Tramps normal level, all blue quests will be unlocked. This sector is significantly different than other areas/maps in the game. You will walk slower underwater than on land in the beginning. Gradually you can increase your walking speed underwater and interestingly you can even walk faster underwater than on land in later stages. But lets come back to this in a bit. First and foremost, what are the important challenges of T5? and how to prepare for them? a. Challenge Number 1: Oxygen All characters begin with 15 units of maximum oxygen level. When you enter water, you start consuming this oxygen. When you have depleted this oxygen, you will have to use an oxygen tank (from miracle coins) or an oxygen vial (rewarded from quests) for continuing your journey further underwater. Your first friend in this case is something that reduces the oxygen consumption and in turn your oxygen lasts longer. This can be achieved through equipment and potions/scrolls. There are also Talents that reduce oxygen consumption, but we will cover Talents later in an upcoming section. Equipment that reduces oxygen consumption are called as “Helmet of Diver ..”. These are helmets that have an attribute which reduce the oxygen consumption by 30%. An example helm is shown in the picture below. These are, of course, available in Heavy/light/cloth categories and can be purchased at the Smuggler NPC in the main town of T5. These can be purchased for the currency: “Pirate Doubloons”. We will cover about this currency in an upcoming section. Some of the Potions/Scrolls that will help reduce oxygen consumption are shown in the picture below, There are also scrolls that are rewarded from blue quests which can help you but I don’t recommend using them. They are worth a lot of gold which can be earned by selling them to NPC. My personal favorite is the Diver’s Revitalizing Mixture. This potion sells for very cheap during Ship Graveyard chest sale and is the best potion because it also increases your energy. Your second friend is something that increases your maximum oxygen capacity and in this case that is the Reputation with Mermen of Depth. We will talk more about the reputation later but for this section, Maximum oxygen capacity increases to 17/19/22 at 5000/15000/35000 reputation. Now time for the next underwater challenge! b. Challenge Number 2: Underwater Speed Your underwater walking speed is significantly slower than on land without any bonuses. This is one of the reasons why many people are afraid of this territory. But from my personal experience, gradually progressing from slow to extremely fast underwater walking speed is much easier than you think. Just like in the case of Oxygen, equipment and scrolls can help you increase your underwater walking. Talents and Merman reputation help too. How much speed is increased in terms of percentages will be added to this guide in future, but for now it can be said that each increase is noticeable. Equipment that increase underwater walking speed are called as “Flippers of Diver ..”. These are boots that have an attribute which increases the underwater walking speed. An example boot is shown in the picture below. These also can be purchased for Pirate Doubloons at the Smuggler in T5 town. Scrolls/Food that can increase your underwater walking speed are as follows. While the Blue one can be received from Ship Graveyard Chests, the latter one can be bought at Smuggler. Both can be used at the same time. Your underwater walking speed also increases at 5000/15000/35000 reputation with Mermen of Depth. At 35000, your underwater walking speed is same as on land (if there are no other walking speed bonus). Talents can also increase your underwater walking speed. To summarize, your underwater walking speed increases with following accomplishments/bonuses – 1. 5000 merman reputation 2. 15000 merman reputation 3. 35000 merman reputation 4. Flippers of Diver’s 5. Scroll of Underwater Speeding up 6. Smoked Marlin 7. Talent: Calm Swimming 8. Talent: Swimming Technique 9. Summon White Rat minion 10. Classless Skill Book: Might of Depths That’s a total of atleast 10 possible different bonuses. From my personal experience, the easiest way to obtain underwater walking speed is to get flippers and then merman reputation, ask your Pirate Doubloon rich friend to gift you Smoked Marlins and finally the two Talents. c. Challenge number 3: Fighting the Strong Underwater monsters An earlier famous guide already enlists some of the monster types and their dangers. Here we will focus on what type of equipment you will need to tackle them with ease. Obviously, it has to be divided into two categories: 1. Weapons, 2. Gears Before diving into that, lets quickly try to understand our enemies. The entire Ship Graveyard can be roughly divided into two halves, The upper half and the Lower Half. Most of the monsters in the upper half are generally weaker than the monsters in the lower half. Monsters can be divided into 4 categories – 1. Normal Monster – These have a green crown 2. Strong Monster – These have a blue crown 3. Elite Monster – These have a yellow crown 4. Boss / Raid boss – Well, there is no need to explain the difference between a monster and a boss As the level of monster increases, their attack strength and defensive strength as well as chances to use control skills on you also increases. An example of an Elite monster are the pirates inside the sunken ship. Try to fight with them and you instantly see they will use atleast 2 to 3 debuffs or control skills before one of you defeats the other. There are more Strong/Elite monsters in the lower half of map than the upper half. Now as we understand our enemy a little better, lets try to see how to work on our equipment to become stronger to fight them. 1. Weapons When it comes to weapons, the most useful weapons are the Sea Weapons, which again, can be purchased from our dear Smuggler in the town. These weapons contain the attribute Depth’s Fury which is an extremely useful attack parameter underwater. Depth’s Fury does not only increase your basic attacks, it also increases your critical attack strength. For example, if your base attack strength is 1000 and your Depth’s Fury is 40%, your normal hit to monsters (without counting for their defense) underwater should be 1000 + 40% = 1400… As well as your critical hit should be 1400*2+40% = 3920! Actual calculations are much more complicated than this, but it should give you a rough idea. There are also sea weapons awarded from blue quests, but these are not good enough and a better idea would be to wait till you get your Lord’s Sea Weapon from smuggler and until then depend on scrolls to increase your Depth’s Fury. Now that we are talking about scrolls, the best scroll to increase your Depth’s Fury is shown below. It is received from Ship Graveyard chest and is usually sold for very cheap prices. It increases your Depth’s Fury by 11.6% Another personal recommendation: when you get that sea weapon, amplify it. It definitely pays off in the longer term and considerably increases your attack strength underwater. Enchant it with Bloodlust crystal even if it is at low level of amplification. In general Depth’s Fury is more beneficial than normal attack strength. For other attack parameters, Critical Hit is the most important parameter. The more critical hits, the more you benefit from Depth’s Fury. Accuracy is also very important because most underwater mobs have a very high Dodge% which means you need high Accuracy to fight them. I personally place these two parameters above Penetration for the Seas. 2. Gears From earlier suggestions, The Diver’s Helm and Boots are undoubtedly the best underwater equipment. However, rest of the gears vary differently by class and personal preferences. Even then, what is important is to have certain defensive Parameters which will help you underwater. And one of the most important is – Resistance. When you fight 2 or more monsters underwater together (which will happen very frequently), chances are that you will face hydrophobia and stun constantly in a cycle. And before you respond, you will be already dead. To avoid or atleast reduce this kind of situation, Resistance is the best parameter. With Resistance, you have a good chance to bread the deadlock of non-stop control skills by resisting one of them in between. This gives you time to kill some monsters and hence bring the situation in “your” control. Another important parameter is “Solidity”. Remember that monsters in Ship Graveyard have an “Increased Critical Damage hit”. To make things worse, some of them also have a very high critical hit %. Which means, they will hit you with more critical hits and with high damage. Solidity will reduce the number of critical hits that you take. There is no one golden number. But you never have enough solidity till you have at least 25-30% solidity. Lastly, “Steal Health” is another important parameter for damage/tank classes because you will lose health fast hence the only way to regain health fast is to “Steal” it. a. Your Friend Number 1: Reputation with Mermen of Depths We mention this a few times before already. But what is reputation with Mermen of Depths and how to gather it? Like most other reputations in the Ayvondil Map, you will gain reputation with Merman of Depths after doing some yellow quests and everyday after doing some blue quests. There are many other ways to gain it and some of them are as follows – 1. Daily Quests from the Mermen (middle island T5) – About 500 Daily 2. Guild event: Descent into a Grotto – 300 each time 3. Guild vs Guild Event: Mermen Trials – Upto 1200 4. Guild vs Guild Event: Invasion of Chaos – Upto 1200 5. Dungeon: Lair of Sea Tramps – Upto 600 daily (upto 1800 daily on 3x Reputation weeks) 6. Raid boss kills – 100 reputation each per death of raid boss Octopus/Orcinus in area 7. Exchanging your Spring Event reputation for this reputation Unlike most other reputations, this reputation is expendable. It can be used to purchase Talents. Talents are reputation expensive and one should focus on building the reputation slowly and consistently. Participate in Raid boss kills, Participate in Guild events, do daily quests and encourage your Guild members to join for Guild events. Important Note: 1. When you spend your reputation to study Talents, your reputation goes down naturally and you will lose any “stage” bonus that you had. For example, Squash had 35000 merman reputation and consequently he had 22 maximum oxygen level and 100% underwater walking speed bonus. However, Squash deemed it necessary to study X talent for 6400 reputation and thus – he gained the talent but his reputation went down to 28600. Thus, his oxygen and walking speed bonus reduced to the 15000 level. That is, 19 Maximum Oxygen and 80% underwater walking speed. 2. The maximum reputation level is 35000 beyond which no more reputation is collected. Thus, if you want to keep studying talents, you should study a talent when you are close to 35000 rep. Otherwise any excess reputation that you gather beyond 35000 is lost. b. Your Friend Number 2: Talents Talents are passive bonuses that you gain when you study them in the Menu > Character > Talents section. Some of these talents work in the entire Ship Graveyard (Land + Underwater) while some of them only work underwater. The earlier published guide mentions about talent names the cost to study them. Here, I would list some of the most important talents which usually go unnoticed – 1. Dodging tactics: This talent gives you 6% chance to avoid critical blow underwater at 3/3 level. This is equivalent to having an additional 6% solidity underwater. 6% less critical hits – isn’t that very useful? 2. Swimming Techniques: This talent gives you extra 10% underwater walking speed when you consume an oxygen vial. When you have done daily quests in T5, you will realize you get plenty of oxygen vials in reward. What to do with them? When you enter water, just use one of them and you get extra 10% walking speed. Isn’t that great? 3. Long-Lasting Defense, Preventing Hydrophobia and Survivability are some other important talents which are very useful underwater. Tank classes with high solidity can avoid Survivability talents but this is very useful for damage and healer/control classes. c. Your Friend Number 2: Pirate Doubloons Pirate Doubloons is a currency that can be used to buy Sea Weapons, Flippers, Helms and other potions/scrolls from the Smuggler in T5. This is one of the most important currencies. It can be obtained by doing the following things – 1. Guild event: Assault of the Ship (750 amount rewarded) 2. Guild event: Descent into a Grotto (750 amount rewarded) 3. The 3 boss kill quests: Inker, Levadis and Admiral (80 amount daily) The fastest way to collect Pirate Doubloons is to join a Bigger guild for a few days and join the Guild events daily with them. Technically, you get this reputation for free and thus you can buy your sea weapons and other gears for free! Isn’t that awesome? Pirate Doubloons can also be used to teleport to certain islands in the Ship Graveyard from the Tew Pilot NPC in T5 town. Once you have excess of Pirate Doubloons, its easy to teleport to Sea Tramps Dungeon or Merman Sanctuary Dungeon. You don’t need to walk every time. 2. Questing in T5 There are two types of quests that you will get in T5 (roughly) 1. From the main town of T5 – Thunderbird Pirate These quests usually reward Thunderbird pirate reputation and usually require you to do tasks in the upper half of Ship Graveyard. The maximum thunderbird pirate reputation you can collect is 5000 and once you achieve the “Friendly” status (i.e. 5000 rep), the guards inside T5 town are no more hostile towards you. The Thunderbird pirate reputation is also linked with the levels of Sea Tramp dungeon that you can access. For Easy level 700 reputation is required, for Normal level 2100 reputation is required, for Hard level 3500 reputation is required and for Heroic/Mythical 5000 reputation is required. In general, if you have decent equipment and sea weapon amplified upto +6/+7 level, you should be able to do most of these quests alone. However, if you are not there yet, take a friend with you and both of you can do the quests together. You can get the quests done faster, and both of you will get rewards for submitting your quests. The more players together, the better. Just like T3/T4 quests Finally, These quests are very rewarding. You get gold reward, guild points, crimson corrondums, scrolls (which you can sell to NPC for gold), oxygen vials, life scrolls, signs of imperishability and even a Pirate Key!!! Pirate keys are your keys to success. Pirate chests give you Pirate Doubloons and a level 30 weapon or level 29 rare belts or even classless skill books! 2. From the middle island of T5 / Trade island – Mermen of Depths These quests usually reward the Mermen of Depths reputation and usually require you to do tasks in the lower half of Ship Graveyard. The maximum merman of depths reputation you can collect is 35000. Minimum 5000 reputation is required to enter the Merman’s Sanctuary Dungeon. This dungeon drops the best of best equipment in game. While some of these quests unlock when you are doing yellow quests in T5, almost all blue merman quests will be unlocked when you have complete the yellow quest for Sea Tramps Normal level Dungeon. Let us be straight here. The lower half of the map is a dreadful place. If you have decent gears, +8/9 sea weapon, and some talents, you can do most of the quests alone. But you have to be smart. Avoid the mobs that you don’t need to kill, cross maps safely and isolate monsters and kill them alone one by one. Once you master the technique of navigating the map safely and managing to kill mobs by one by one alone, you will absolutely enjoy this part of the game. Why? Because it is certainly the most rewarding place in the game. While the rewards discussed in previous section also apply here, there are many more quests from Mermen which increase your chances of getting the Pirate Key and other rewards. Not forgetting the Mermen of depth reputation which you can use to study the talents. A party of atleast 2-3 people should be able to easily navigate the map and do most of the quests. A general route that can be followed to do the quests, is as follows – Credits: This image is sourced from a popular existing guide on T5 in the guides section of forum because on PC version I cannot take a screenshot of the entire map. Hope this guide has given you enough ideas for exploring and surviving the Ship graveyard and will ultimately help you for Mastering the Ship Graveyard!


 3 points
 -
.thumb.jpg.69d52a0e7d327935052ace415d6a771d.jpg) Ура, ещё больше обычных катализаторов из судуков. Вот пожалуйста:
Ура, ещё больше обычных катализаторов из судуков. Вот пожалуйста: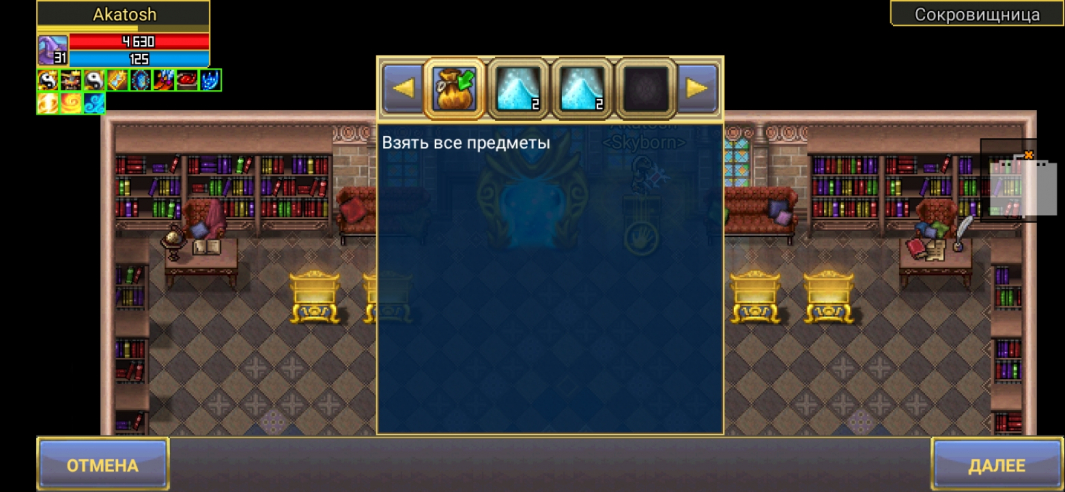 3 points
 -

Актуальный контент без привязки ко времени
Leslie Nielsen and one other reacted to Snikerdos for a topic
Хочется обсудить проблему того, что весь актуальный контент привязан ко времени. Если раньше это были только гвг, то теперь и в топ инст не сходить, когда удобно... Есть люди, которые не могут играть во время событий, по разным причинам: кто-то работает, разные часовые пояса, наконец у многих семьи, дети, которым надо уделять внимание а первую очередь. А перед сном есть несколько часов на любимую игру, но весь топ контент проходит мимо, да и в гильдии такие мешки теперь не нужны. Будет ли что-то меняться? Или игра только для школьников и тех, кто подстраивает жизнь под игру? 🙄 Глупо просить соло контент в мморпг, но хочется играть актуальный контен в свободное время, а это не возможно. Думаю, таких людей очень много. Спасибо всем за внимание)2 points -
Проблемы гвг тритонов №2
Shanalotta and one other reacted to DaviINK for a topic
Ну актив не всегда показательный. 70 дарков сильнее 80 условных врагов. 70 хевенов при равных баффах сильнее 85 условных врагов. (Навскидку).2 points -
хз, суперсбалансированный перс вроде. убивает кучу всего на арене во многих связках. проигрывает только хорошо сыгранным парам, или персам, одетым на максимум. я бы даже фиксанул урон в физических скилах, но там в принципе большой кд на остервенении, а на беге вполне можно и уменьшить урон. раза в 2. в апах перс точно не нуждается, очередной петух у гор получился, при чем еще и без контроля2 points
-
Не все игроки вражеского альянса враждебны, некоторые даже помогают, при виде низкоуровневого тебя, выполняющего кв. Тут, увы, надо приспосабливаться. Кто-то прийдёт и убьёт, кто-то не откликнется, а кто-то прийдёт и поможет. По всякому может быть. Не нужно забывать и о мир чате, он не без добрых людей, у которых есть свободное время. Врагов тоже нужно понимать, он вточился на +10, а тратить энергию некуда (Типа стоит в гараже машина, и пылиться, почему и не поездить). Кто поумнее в инсты пойдёт, кто на арену, ну а кто ищет лёгких путей - пойдёт сливать новичков. Но не переживай, будет и на твоей улице праздник ) Лучше поищи дружную ги, заведи друззей и вместе наслаждайся контентом, ведь вместе - интереснее. А там, подрастёшь, вточишься и сам пойдёшь лица ломать ) Каждому ведь надо самоутверждаться )) Ведь, чем сложнее победа, тем ценнее она. А получить всё сразу и на блюдечке - отобьёт всё желание достигать ещё чего-то. Успехов тебе автор, не отчаивайся 🙂2 points
-
в вов в основе своей играют взрослые люди, лояльность у игроков другая, там вместо того чтобы убить врага который пинает хайлвл моба - он поможет убить самого моба лишним ударом. Коротко говоря убийство лоулвл игрока никому не приносит никакого удовольствия, будь у меня хайлвл я бы такой дичью не занимался в варспире, в вов тем более - там если узнают что ты этим занимаешься тебя могут попросту кикнуть с ги пинком под зад. Это портит геймплей, портит игру новичкам.2 points
-
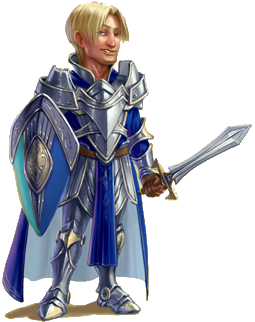
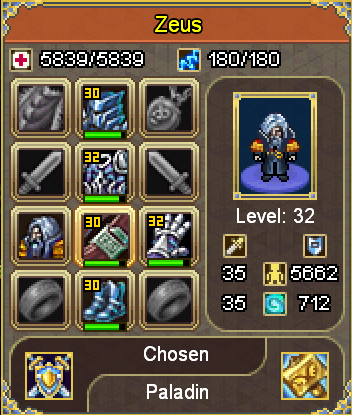
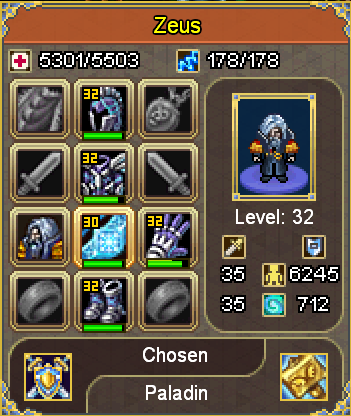
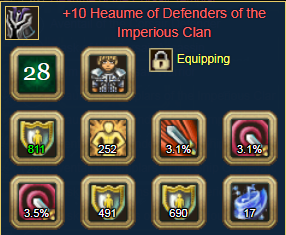
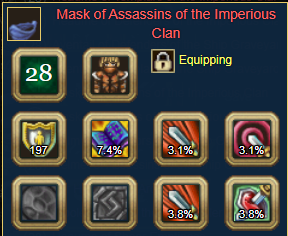
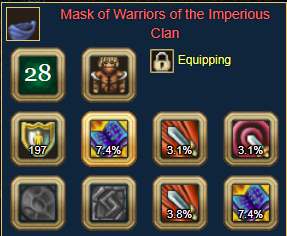
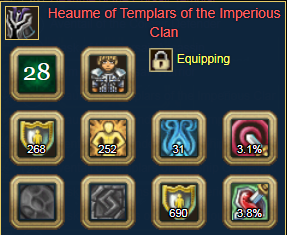
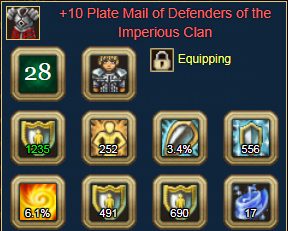
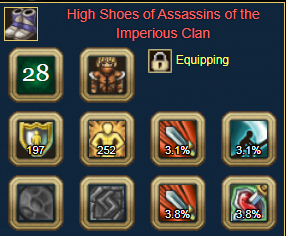
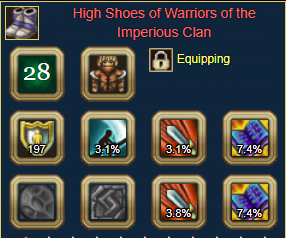
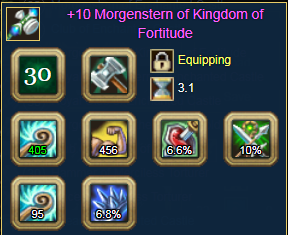
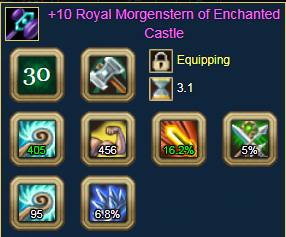
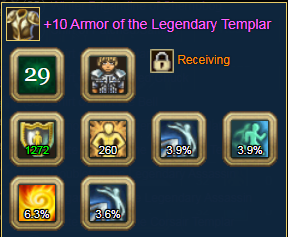
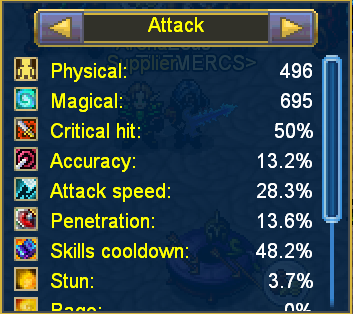
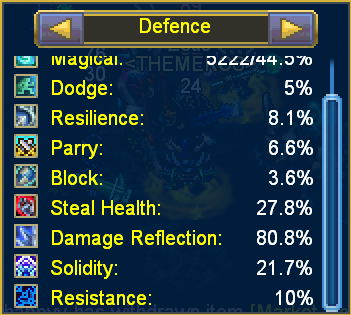
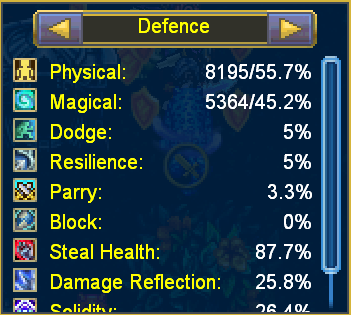
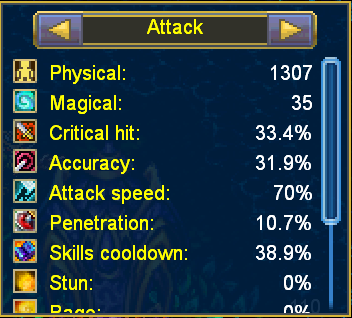
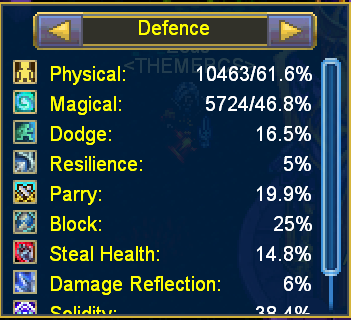
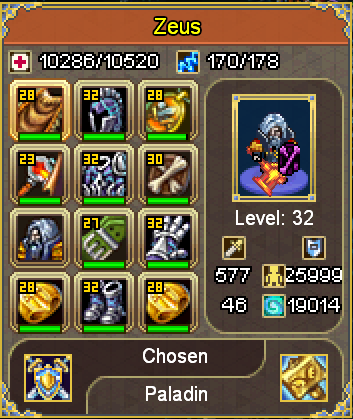
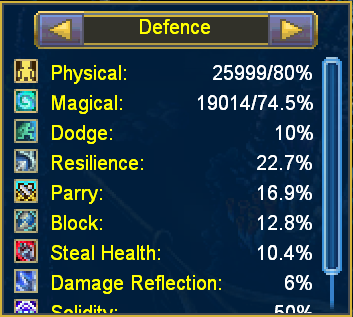
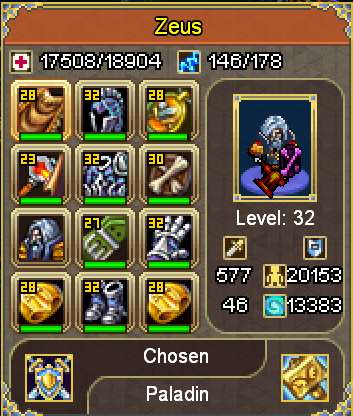
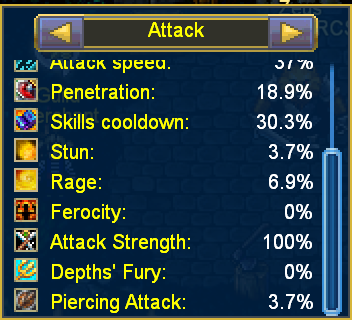
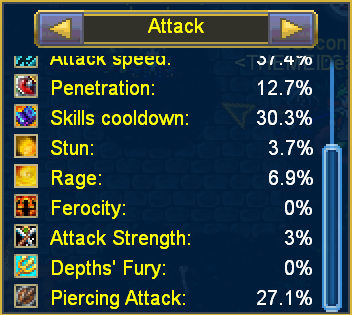
#1 Paladin Guide 1. Introduction 2. Base, Expert Skill and Relics Setup 3. Weapons, Gears and Books 4. PvE, Dungeons and Raids Tips and Tricks 5. PvP, Arena and Wars Tips and Tricks 6. Summary 1. Introduction: Paladin is a class under appreciated by many because of its lack of damage burst potential, but it can deal damage as much as mage and heal as much as priest in team fight or dungeon. Most used expert skill Sacred Shield, Least used expert skill Sun seal. Paladin's power lies in his abilities to support and amplify his team mates or control enemies. He is feared by his enemies in arena and close combat fights, having heal and aggro skills makes him the best tank to out aggro any other class in game. Jumping into fights and support his team mates in wars while silencing enemies with Fetter. This guide is made for high level paladins mostly so i will show maxed set of gears and weapons to be used. FACTS 1. Less than 5% of Sentinel players made paladins, from 9 total sentinel classes average should be 11.11% 2. Paladin most useful in arena because of his sacred shield 3. Paladin has more damage reduction than a warden at low hp 4. Paladin can steal aggro of any boss from any class if maxed PvE skills 5. Paladin is better than a mage, priest or druid in dungeon if he has maxed banner and support skills 6. Paladin worst enemy is Warlock due to its multi disable skills 7. Rogue's worst enemy is Paladin 8. Paladin weakness is being far from enemies, silence, disable, stun 9. Paladin strength is being close to enemies 10. The only class that can replace any other class in any situation except dealing massive damage Chosen passive: Spirituality (+10% Energy) Shield: Can equip shield (+15% physical/magic defense) Can equip one handed axe Can equip two handed axe Can equip one handed sword Can equip two handed sword Can equip one handed mace Can equip two handed mace Can equip spear Can equip heavy armor Can equip Lightweight armor Different gear and weapon options makes him playable in many different ways to suite your needs. In this guide we going to discuss 3 types of builds: Pure PvP, Pure PvE, Hybrid We are not going to discuss what each skill does, but how each skill can be used effectively, tips and tricks of paladin, if you want simple description of each skill you can read them in game or on forum they are available to anyone, because lets be honest not all cares about % of this and that, what your really care about is what is the best for some type of situation without having to read a page full of numbers and %, will add full description of each skill details in the end of the guide if any requests for it. 2. Base, Expert Skill and Relics Setup: Pure PvP Arena,1v1,War,GvG and anything related to versus players Purifying 5/5 After u fetter your opponent use this skill to inflect extra magic damage on him, but if cool down is over recast it fast, this skill can be used to activate some cool bonus relics for extra stats Tip1: use it after fetter Tip2: use it whenever it possible Fetter 5/5 Use this skill to silence and trap your enemies, making them unable to move or cast skills Tip1: can be used after Harrad's Call if enemies are far Tip2: use it when in mid of enemies Tip3: use it to stop your enemies from running away Light Aura 1/5 Use this skill in the start of battle to increase healing effect of yourself and your party Tip1: use it to trigger relics most often Persuasion 1/5 Use this skill to reset your enemies attack sequence and confuse them can be crucial in arena Tip1: use it 1v1 to reset your enemies attack and activate relics Tip2: use it in war of map2 to rest your enemies attack on flag Tip3: use it to aggro enemies who can go invisible Tip4: use it in 2v2 to save your partner if the enemy attacking him Tip5: not to be used in group wars or GvG Heavenly Light 3/5 Use this skill to heal yourself or your allies in time of need, most effective with magic build setup Tip1: if using magic items, use this as much as possible to support yourself and your allies especially in arena make sure you use only 10 skill points on base skills leave other points for expert skills Illumination 1/4 Deals Magic damage to enemies in a small AoE, best combined with stun or life steal stat Tip1: equip stun weapon and stun buffs and use this skill non stop to stun your enemies and reset their attack sequence Tip2: mostly used for its possibility to stun enemies in an AoE and make them lose aggro on your allies Tip3: if enemies are far Harrad's Call > Fetter > Illumination Harrad's Banner 1/4 Use this skill before entering the battlefield but take care enemies can run from it so be sure to use it wisely (doesn't trigger any stun stat) Tip1: can be used also in a tricky way to kite your enemies leaving it behind you so they get delayed to follow you Tip2: in 1v1 use it before enemy can reaches you Tip3: use it after Fetter so enemy cant run from it Tip4: use it before you or your allies cast any other damage spells to increase their damage output on enemies Sun Seal 1/4 Basically useless not used skill in war or 1v1 hardly it will consume your mana and time to use it better focus on other skills in hotkey Tip1: in 1v1 use it to increase life steal on enemies Tip2: use it before using Shield Strike to heal a fixed % of your max hp Harrad's Call 1/4 Can be maxed for better % stun chance and better damage but at level 1 still effective and better use skill points elsewhere Tip1: use it to run from or towards enemies Tip2: jump into enemy groups to stun them Tip3: use Fetter always after it Tip4: use it to initiate a fight in 1v1 vs ranged enemy Tip5: use it to initiate any arena fight or after Harrad's Banner Shield Strike 4/4 for 1v1 only, other than that 1/4 for 1v1 this is crucial to stun your enemy for longer period of time and it increases the % of hp recovery if combined with sun seal Tip1: use it to initiate a fight in 1v1 vs melee enemy than run towards them for 0.5 second than cast Fetter Tip2: use it after Fetter is about to end to maximize your disable to enemy Tip3: push enemies away from yourself or your allies Sacred Shield 1/4 for 1v1 only, other than that 4/4 this is basically best support skill paladin has in a non 1v1 fight, it cant be used on yourself, only on allies or minions if level 3 or above the paladin will receive a shield also Tip1: the more max hp you have the more effective it is Tip2: use it to initiate a fight anywhere Tip3: use it when paladin has low hp, the lower the hp the better only if paladin has Inner Force, because it reduces damage deal and making shield last longer Tip4: cannot be used in 1v1 fair fight because you need a minion or someone to cast it on to receive a shield on yourself also its powerful in 1v1 Tip5: use it after using Paladin's Prayer on ally to make it more effective Tip6: in a 2v2 arena fight must initiate the fight with it and use it whenever possible before any other skill Light Defense 1/4 can use it anytime you want to increase your party % physical/magic defense Tip1: best used in full party early before meeting enemies by 5 second Paladin's Prayer 4/4 can be used in early fight if you know the enemy going to deal heavy damage on you or your ally in next 4 seconds or can be used after receiving few hits, the early the better so can recast more of it later on Tip1: in a 1v1 the early use of it the better but in a team fight save it to see who in your party is dying and heal them Inner Force 4/4 (Passive no animation) if your looking for survival and tank mode this is the best skill to survive at the lower the hp you have, sometimes few points matters between winning and losing a match or a war Tip1: best to combo with it supportive skills or buffs, use Sacred Shield with it at low hp for maximum effectiveness Pure PvE Dungeons,Questing,Raid Bosses anything related to farming Purifying 3/5 or 5/5 if going full physical PvE paladin Use this skill whenever possible Fetter 1/5 or 3/5 or 5/5 helps a bit in PvE but not really important much other than escaping mobs or reducing their damage mostly gets resisted by bigger mobs Light Aura 5/5 make sure Heavenly Light is maxed before leveling this skill Persuasion 1/5 or 5/5 if going full tank mode must have at level 5 if full tank PvE paladin, use it immediately to aggro mobs Heavenly Light 5/5 this also effects aggro in healing making it possible to aggro any boss you like make sure you use only 10 skill points on base skills leave other points for expert skills Illumination 4/4 Deals Magic damage to mobs in a small AoE, best combined with stun or life steal stat Tip1: equip life steal magic weapon and magic buffs and use this skill non stop to deal damage and life steal mobs Tip2: attack never misses and helps aggro mobs Tip3: if mobs are far Harrad's Call > Heal > Illumination Harrad's Banner 3/4 Use this skill before engaging with mobs Tip1: can be used also in a tricky way to kite mobs leaving it behind you so they get delayed to follow you Tip2: cast it early before you or your party start attacking mobs Tip3: most effective at big hp mobs to deal extra damage on them Tip4: best combo: Harrad's Banner > Fetter > Illumination > Call Sun Seal 1/4 use it on mobs to increase yourself and your party life steal parameter on that specific mob Tip1: basically adds extra magic damage in PvE if using magic weapons Harrad's Call 1/4 Can be maxed for better % stun chance and better damage but at level 1 still effective and better use skill points elsewhere Tip1: use it to run from or towards mobs + stun them Tip2: use Illumination always after it Tip3: run faster by jumping forward on the map Shield Strike 1/4 Pure PvE paladin most effective using magic weapons not physical but either way this should be level 1 for PvE Tip1: use it to push bosses or mobs 2 yards in any direction you want (sometimes resists bosses) Tip2: take care while using it to not reset bosses or mobs Sacred Shield 3/4 this is basically best support skill paladin has it cant be used on yourself, only on allies or minions if level 3 or above the paladin will receive a shield also Tip1: the more max hp you have the more effective it is Tip2: use it before entering mob areas Tip3: use it when paladin has low hp, the lower the hp the better only if paladin has Inner Force, because it reduces damage deal and making shield last longer Tip4: use it after using Paladin's Prayer on ally or yourself to make it more effective Tip5: if solo farming use it on a minion to receive a shield to yourself also Light Defense 1/4 can use it anytime you want to increase yourself and your party % physical/magic defense Tip1: best used in full party at any time Tip2: Inner Force is more better at level 4 if your the tank than Light Defense Paladin's Prayer 1/4 use it when someone losing hp fast keep it for emergency can be crucial at important moments Tip1: use it as last resort keep it for emergencies in helps in life or death situations Inner Force 3/4 if your looking for survival and tank mode this is the best skill to survive at the lower the hp you have, sometimes few points matters between dying and staying alive in PvE Tip1: best to combo with it supportive skills or buffs, use Sacred Shield with it at low hp for maximum effectiveness Tip2: dont be afraid if you have low hp you wont die easily Hybrid Mix setup of skills that allow you to excel in anywhere and everywhere in warspear Purifying 5/5 Fetter 5/5 Light Aura 1/5 Persuasion 1/5 Heavenly Light 3/5 Illumination 1/4 Harrad's Banner 3/4 Sun Seal 1/4 Harrad's Call 1/4 Shield Strike 1/4 Sacred Shield 4/4 Light Defense 1/4 Paladin's Prayer 3/4 Inner Force 3/4 Tips of how to use skills effectively for Hybrid is a combintion of Pure PvP and Pure PvE 3. Weapons, Gears and Books: Best books for Paladin are defensive books: Magical Toughening skill book - increases magical defense of the character by 20% and decreases incoming magical damage to a character from an auto attack by 10% when the current health is lowered to 30% when compared to the maximum Physical Toughening skill book - increases physical defense of the character by 20% and decreases incoming physical damage to a character from an auto attack by 10% when the current health is lowered to 30% when compared to the maximum Power of Life skill book - increases character's maximum health by 6% and health regeneration by 15% Magical Protection skill book - increases numerical value of character's magical defense by 10% The Power of Blood skill book - increases character's and all party members' "steal health" parameter by 10% when party's combined health level is less than 50% Distortion of Life skill book - Restores character's health by 150% of the damage inflicted by the enemy when the character is under the debuff "stunning" with a chance equal to the value of character's "steal health" parameter. However, this effect has a cool down of 2 seconds Reflection plays a role in tanking mobs/bosses Pro Weapons: PvP Magic Stun mace (magic enchanted) + Arena shield (fero enchanted) or Arena mace (magic enchanted) + Stun shield (fero enchanted) Accessories: craft cape,arena amulet,arena rings magic 2 handed mace is not recommended for arena For GvG and Wars AoE stun magic mode: Stun Magic Spear (stun enchanted) PvP Physical Double Pene Mace (fero enchanted) + Arena shield (fero enchanted) Accessories: arena cape,resist amulet,arena rings physical PvE Magic Life Steal Hammer Pro Gears: PvP Half Greatness + Half 32 Heavy + Belt Light Craft PvE Half 32 Heavy + Half 32 Light + Any good PvE Belt 4. PvE, Dungeons and Raids Tips and Tricks: PvE for paladin is mix set of Heavy and Light Gears and Life steal magic weapons u can pick what ever level gears you want best for 32 paladin is Mermen mixed gears heavy 2 pieces and light 2 pieces but you will need massive mana regeneration and mana book maybe Affordable Gears for average paladins: Cape: Magic | Mana Reg | any stat is good (preferably more magic or life steal) Enchants: Critical | Life Steal or Parry Amulet: Magic | HP or Pene | any stat is good (preferably life steal) Enchants:Accuracy | Life Steal or Fortitude Ring: Magic | HP or Accuracy | any stat is good (preferably life steal) Enchants: Mana Reg | Life Steal or Fortitude Belt: *Heavy Belt preferably* HP | Pene or Critical | Accuracy or Parry Enchants: Mana Reg | Retribution or Fortitude Helmet | Armor | Gloves | Boots: pick any 2 light 2 heavy gears of the following sets of heroic gears Helmet Enchants: Accuracy | Defense Armor Enchants: Rage | Defense (Tip: Better use light armor because most heavy armor has -block- and if using 2 handed magic setup its a waste of stat to have -block- only works with shield equipped) Gloves Enchants: Pene | Defense Boots Enchants: Stun or Cool Down | Defense (Tip: Better use boots which has mana regeneration) Tip: use 2 of the same set 2 light same set. 2 heavy same set Affordable Weapons for average paladins: Hammer: Magic | Retribution or Parry or Dodge (Tip: you can use physical weapons also but magic is most preferably considering most damage skills paladin has are magic related) How to use paladin in PvE situation: Combo: Harad's Call > Harad's Banner > Fetter > Illumination > Purify > Heavenly Light + Sacred Shield (if needed) 5. PvP, Arena and Wars Tips and Tricks: PvP for paladin is a full set of Heavy Gears for those who cant afford a mix of 2 pieces 30 greatness and 2 pieces 32 heavy mermen gear go by the following Affordable Gears for average paladins: Cape | Amulet | Rings: Same from PvE affordable set (if Physical 1 handed mace than get physical accessories and if Magic 1 handed mace than get magica accessories) Helmet | Armor | Gloves | Boots | Belt: (Follow the enchants shown in the pictures below) 6. Summary: Paladin can be Tank, Support, Healer, Crowd Control, Stunner, Silencer and Damage amplifier Hero. I'm going to show you in this summary what cool paladin stats he can have and can reach things beyond your imagination. Retribution Paladin: 80.8% Damage Reflection Vampire Paladin: 87.7% Steal Health Resist Paladin: 100% Resistance + 50% Solidity Speed Paladin: 70% Attack speed Block Paladin: 16.5% Dodge + 19.9% Parry + 25% Block Rock Paladin: 25999-80% Physical 19014-74.% Magical Defense Monster Paladin: 18904 HP Critic Paladin: 50% Critical Hit Auto Paladin: 100% Attack Strength Pierce Paladin: 27.1% Piercing Attack


 1 point
 -

Призыв Нетопыря
Aang reacted to Deprecated for a topic
Добрый день. Хотелось бы предложить добавить заклинателю питомца-баффера. Механика работы подобная призыву птички - на выбранного игрока призывается летучая мышь, дающая всем игрокам рядом с ней в пределах 2 ярдов 5% вампиризма и кд на максимальной прокачке раз в 3 секунды (длительность самого баффа 15 секунд). При каждом применении нетопырь будет тратить 10% от своего хп. Длительность 20-30 секунд. Питомец при этом не наносит никакого урона. Эффекты суммируются.1 point -
Привет, в этой игре я недавно и решил сюда залететь после нескольких лет однообразной и не только игры в варкрафт, я любитель жанра мморпг и сразу после прохождения нуба начал гореть так будто бы я играю в шутер где меня убивают как свинью донатные мальчики. Не особо рыскаю форум, поэтому не знаю насколько здесь обсуждают наболевшую тему о таких случаях как "PK" или "SK" - называйте как хотите, но думаю эти термины многим известны. Проблема есть и она сильно заметна, залезая вглубь этой темы я лишь хочу задаться таким вопросом: "почему поощряют такой геймплей?". Ты новичок, заходишь в игру дабы насладиться ею, изучить ее, но буквально отойдя пару локаций от того же порта в ирсе на твой фракционный "лагерь" начинают нападать игроки уровня 30-32 - особо смелые мальчики в чьей силе я не удивлен, но когда лезут еще и 20 - я начинаю полыхать с вопросом о том: "им что, заняться больше нечем?", ты респавнишься от смерти и тебя опять убивают не давая шанса и одного ярда пройти. Проблему такого НЕТИПИЧНОГО для мморпг игр геймплея я заметил в первые дни игры, но знатно мне подгорело именно во время игры ночью, ты стоишь казалось бы проходишь квесты, какой-то сюжет, вникаешь, не поверите но даже читаешь диалог нпс как тут же в момент тебя убивает с одного удара рога из инвиза или чего хуже - хант, выпуская свою смертоносную стрелу через больше чем 5 ярдов и заставляя тебя упасть мордой в политую кровью землю, после ты появляешься на статуе потому-что нет возможности появиться где-то еще и тебя он опять же убивает, приходят еще такие же умные хайлвл игроки и начинают тарабанить всех нпс которые к слову ВООБЩЕ из себя ничего не представляют, спрашивается зачем они вообще нужны? зачем нужны нпс-стражи, эти отважные охранники со щитами? от них ноль импакта, у них хп меньше чем у меня хотя уровень превышает мой, они также убиваются с одной тычки и совершенно никак не влияют на защиту лагеря или чего скрывать - целого порта, После таких моментов игры отпадает полное желание продолжать играть, ты сидишь в камере "наблюдения" после смерти 10 минут и ждешь пока больные на голову школьники позабавятся и уйдут пинать другой лагерь и начнут портить геймплей другим игрокам. Почему бы не придумать какие-то ограничения, рамки которые будут запрещать тебе входить в локацию для лоу-лвл игроков? - ну тут ладно, это сразу не понравится многим, но почему хотя-бы не сделать "безопасную" со стутуей возрождения зону реально безопасной? почему стражники такие слабые? почему нет какой-то защиты от пвп? почему нет банально хотя-бы десятисекундной неуязвимости после возрождения? мы спавнимся с убитым наполовину хп что делает нас еще более слабой целью для игроков, так еще и убежать нельзя. Че делать-то? терпеть это насилие? я понимаю что подобное есть в шутерах, но чтоб это было в мморпг с открытым миром - это треш, В общем-то мне просто нужен действительно развернутый и адекватный ответ, желательно со стороны администрации или приближенных к ним игрокам, меня интересует планируют ли решать эту проблему, а не заниматься добавлением нового донат-сундучка за чм. Большая просьба, не пишите сообщения по типу: "не нравится - не играй", если бы мне действительно не нравилась игра - я бы ушел и не стал клепать тут топик с описанием проблемы, а так я решил совместить вопрос с предложением повсеместно с обсуждением.1 point
-
Я вообще не знаю, близится лето - время глобальных обнов, и есть ли вообще смысл менять текущий контент, останется ли он актуальным. Гвг тритонов создало несколько проблем. Первая в том, что пропал стимул для развития гильдий низкого уровня, как у нас на амбере например. Стимул качать ги на 10 лвл есть. Потому что 15% скорости и кд это суперважные пассивки для каждого перса в обеих основных сферах игры: пвп и пве. А уже 11 и 12 лвл не так и важно. Вторая заключается в том, что гильдии 12ого лвла, которые занимают 3тье-5ое место на сервере по силе гильдий, с более менее неплохим пвп-составом постоянно не проходят собу и наблюдают за тем, как на низких уровнях какие-то "никто" в пве-шмоте проходят пустые гильдии и фармят инст тритонов. Чтобы решить эти проблемы, я считаю, нужно сделать разброс встречи противников в 2 лвла: 12-10 и так далее. Это так же уберет проблему актуальности развития гильдии на 12 лвл. И самое тупое, что сейчас можно лицезреть - это система подбора противников. Частный пример у нас на амбере. Я 12й лвл ги с октября, уже полгода, за это время я ни разу не видел в противниках гильдии 11ого лвла, которые все намного слабее меня. Я всегда летаю на более сильные гильдии вражеской фракции 12ого лвла, приправленных битвой, зачастую проигрываю, иногда выигрываю. Изредка нас кидает к более слабым гильдиям 12ого лвла, которые мы всегда побеждаем. Главный вывод из этого - почти всегда топовые соперники, ни разу против 11ого лвла за полгода. У нас есть еще одна гильдия 12ого лвла, которая 12 лвл уже несколько лет. За них точно не скажу, но я ни разу не видел вообще за год, чтобы их кидало на 11 лвл, и за последние полгода с уверенностью в 95% могу сказать, что на 11 лвл гильдии их тоже не кидало. И у нас есть еще одна гильдия 12 лвла, которая долго месила слабых соперников будучи 11ым лвлом, потом 10ым лвлом, потом снова 11ым лвлом, и вот, как будто система какая-то супертупая, даже после того, как они уже 2-3 месяца апнули 12й лвл их регулярно кидает на слабые гильдии 11ого лвла. И таких гвг у них гораздо больше чем 2 этапа против сильнейших гильдий вражеского альянса. Исходя из этого я вообще не знаю, что там курит текущая система матчмейкинга. Я считаю, что она должна учитывать всего лишь винрейт гильдии во втором этапе. Чтобы те, кто всегда выигрывает дрались с теми, кто всегда выигрывает. Те, кто постоянно выигрывает слабых соперников - поднимались в винрейте и отлетали от сильных, и тогда в теории их будет кидать почти по очереди, сначала на сильных, потом на слабых. Может вообще разбить это на категории, как на арене. Сделать 2 категории: 7 8 9 и 10 11 12 с шансом 9 улететь на 10, как это было в старых жестко фиксированных категориях арены, когда регать можно было только в рамках своей категории, но в некоторых боях игроки 6лвла могли улететь на 7й лвл, 10ые могли улететь на 11ых. Чтобы система учитывала винрейт, но в первую очередь сводила гильдии вражеского альянса.1 point
-
Описание класса: Фракция: Избранные Храмовники - воины света, в совершенстве постигшие воинское искусство и тайные знания древних орденов. Храмовников ценят как за стойкость в бою, где они орудуют булавой и щитом, так и за умение ободрить и защитить союзников боговдохновенными речами. Храмовники одинаково хороши в тканевом облачении и в тяжелой броне, что делает их поддержку поистине всеобъемлющей. Особенности: Поддержка группы, дальний\ближний бой, смешанный урон, управление врагами. Атака: Защита: Поддержка: Пассивные классовые навыки: Духовность. Увеличивает максимальное количество энергии на 10%. Посохи. Позволяет использовать магические посохи. Одноручная булава. Позволяет использовать одноручные булавы. Щиты. Позволяет использовать щиты. При надетом щите увеличивается физическая и магическая защита на 15%. Тканевые доспехи. Позволяет использовать тканевые доспехи. Тяжелые доспехи. Позволяет использовать тяжелые доспехи. Базовые навыки: Порицание Магическая атака, наносящая повышенный урон противнику. Дополнительно накладывает отрицательный эффект "Оглушение" на противника на некоторое время, если он находится под эффектом от навыка "Касание истины". Тип: Активный. Одиночная вражеская цель. Дальность применения: 4 ярда Время перезарядки: 10 сек. Расход энергии: 12 | 14 | 16 | 18 | 20 Длительность оглушения (сек.) : 2 | 2,4 | 2,8 | 3,2 | 3,6 Взаимодействие с параметрами: Рекомендуемые реликвии: Дополнительная информация: Вихрь покаяния Атака, наносящая физический урон всем противникам в радиусе 2 ярдов и накладывающая на них отрицательный эффект "Зыбучие пески" с определённым шансом на некоторое время. Эффект уменьшает скорость передвижения противников. При развитии навыка до четвертого уровня и выше эффект дополнительно уменьшает параметр "Точность" у противников. Тип: Активный. Область вокруг персонажа. Время перезарядки: 13 сек. Расход энергии: 18 | 19 | 21 | 23 | 25 Размерность урона (% от физ. силы) : 75 | 85 | 95 | 105 | 115 Шанс прока "Зыбучих песков" (%) : 40 | 50 | 60 | 70 | 80 Время действия "Зыбучих песков" (сек.) : 3 | 4 | 5 | 6 | 7 Уменьшение скорости передвижения (%) : 10 | 20 | 30 | 40 | 50 Уменьшение точности (%) : 0 | 0 | 0 | 17 | 20 Кол-во целей (PvP) : 2 | 3 | 4 | 4 | 5 Кол-во целей (PvE) : неограниченно Взаимодействие с параметрами: Рекомендуемые реликвии: Дополнительная информация: Обратный поток Создаёт вихревую зону в указанной области на некоторое время. Зона каждую секунду отбрасывает всех противников, находящихся в ней, на расстояние нескольких ярдов от края зоны и накладывает на них отрицательный эффект "Оглушение" на некоторое время. Противники не могут двигаться и применять навыки, урон по ним не снимает эффект. Тип: Активный. Применение по области. Дальность применения: 5 ярдов Время перезарядки: 16 сек. Расход энергии: 18 | 19 | 20 | 23 | 25 Дальность отбрасывания (ярдов) : 2 | 2 | 2 | 2 | 2 Длительность оглушения (сек.) : 1 | 1,2 | 1,4 | 1,6 | 1,8 Кол-во целей (PvP) : 3 | 4 | 4 | 5 | 6 Кол-во целей (PvE) : неограниченно Взаимодействие с параметрами: Рекомендуемые реликвии: Дополнительная информация: Благодать Увеличивает физическую и магическую силу персонажа на некоторое время. Тип: Активный. Моментальное применение на себя. Время перезарядки: 24 сек. Расход энергии: 14 | 16 | 18 | 20 | 22 Длительность действия (сек.) : 10 | 12 | 15 | 17 | 20 Увеличение физ. и маг. силы (%) : 10 | 13 | 15 | 18 | 22 Взаимодействие с параметрами: Рекомендуемые реликвии: Дополнительная информация: Боевая поддержка Накладывает положительный эффект "Солнечный барьер" на персонажа или перемещает персонажа к союзнику и накладывает на них положительный эффект на некоторое время. Эффект поглощает любой входящий урон. Тип: Активный. Применения на себя или на союзную цель. Дальность применения: 4 ярда Время перезарядки: 25 сек. Расход энергии: 22 | 24 | 26 | 28 | 30 Длительность действия (сек) : 5 | 6 | 7 | 9 | 11 Размерность щита (% от маг.силы + физ. силы) : 120 | 160 | 210 | 245 | 275 Взаимодействие с параметрами: Рекомендуемые реликвии: Дополнительная информация: Экспертные навыки: Учения харада Каждый раз при оглушении противника на персонажа накладывается положительный эффект "Боевое крещение" на некоторое время. Эффект мгновенно восстанавливает здоровье персонажа и члена группы с наименьшим количеством здоровья в зависимости от магической силы персонажа в радиусе 3 ярдов от него, а также наносит дополнительный физический урон противнику при следующей автоатаке. Тип: Пассивный. Не чаще 1 раза в секунду. Длительность эффекта (сек.) : 15 | 20 | 30 | 40 Эффективность лечения персонажа (% от маг. силы) : 50 | 60 | 70 | 80 Эффективность лечения союзника (% от маг. силы) : 25 | 35 | 45 | 55 Величина дополнительного урона (% от физ. силы) : 20 | 30 | 40 | 50 Дополнительная информация: Касание истины Создаёт зону подавления вокруг персонажа, которая расширяется в течение некоторого времени. Достигнув максимального размера, зона исчезает и блокирует возможность использования навыков у всех противников, находящихся в ней, на некоторое время. Тип: Активный. Вокруг персонажа в момент использования. Радиус применения: 3х3 Время перезарядки: 25 сек. Расход энергии: 22 | 24 | 26 | 28 Время срабатывания (сек.) : 2,5 Длительность немоты (сек.) : 4 | 5 | 6 | 7 Кол-во целей (PvP) : 3 | 4 | 5 | 5 Кол-во целей (PvE) : неограниченно Взаимодействие с параметрами: Дополнительная информация: Мантра исцеления Накладывает положительный эффект "Божественная мантра" на персонажа или члена группы на некоторое время. Персонажа нельзя атаковать, при этом персонаж лишается возможности применять навыки, автоатаковать, использовать предметы, а его скорость передвижения уменьшается. Дополнительно восстанавливает персонажу определённый процент от максимального здоровья в секунду. Тип: Активный. Моментальное применение на себя. Время перезарядки: 46 сек. Расход энергии на применение: 18 | 20 | 22 | 24 Время действия (сек.) : 3 | 4 | 5 | 6 Уменьшение скорости передвижения (%) : 65 | 50 | 40 | 30 Восстановление здоровья (% от макс. в сек.) : 5 | 6 | 7 | 8 Дополнительная информация: Статуя божества Устанавливает статую в указанную область на некоторое время. Статуя забирает часть урона от автоатак по дружественным игрокам в радиусе нескольких ярдов от себя. Тип: Активный. Применение в точку. Дальность применения: 5 ярдов Радиус действия: 3х3 Время перезарядки: 38 сек. Расход энергии: 28 | 30 | 32 | 34 Длительность действия (сек.) : 12 | 16 | 20 | 24 Эффективность поглощения урона (% от автоатак) : 10 | 15 | 20 | 25 Кол-во целей-игроков: 5 Взаимодействие с параметрами: Дополнительная информация: Запрещенный приём Атака, наносящая физический урон противнику, перемещающая противника на расстояние 3 ярдов за спину персонажа и накладывающая на него отрицательный эффект "Оглушение" на некоторое время. Тип: Активный. Одиночная вражеская цель. Дальность применения: 1 ярд Время перезарядки: 20 сек. Расход энергии: 26 | 28 | 30 | 32 Размерность урона (% от физ. силы) : 130 | 170 | 210 | 250 Длительность оглушения (сек.) : 2 | 2 | 3 | 4 Взаимодействие с параметрами: Дополнительная информация: Сила небес Увеличивает максимальное количество здоровья персонажа, а также параметр "Блокирование", если экипирован щит, и параметр "Пробивная способность", если экипирован посох. Тип: Активный. Навык с постоянным потреблением энергии. Время перезарядки: 8 сек. Расход энергии: 20 | 22 | 24 | 28 Увеличение максимального здоровья (%) : 12 | 15 | 18 | 21 Увеличение параметра "Блокирование" (%) : 2 | 4 | 6 | 8 Увеличение параметра "Пробивная способность" (%) : 2 | 4 | 6 | 8 Дополнительная информация: Частица жизни Атака, наносящая физический урон противнику и призывающая к противнику монстра на некоторое время. Монстр наносит магический урон. Тип: Активный. Одиночная вражеская цель. Время перезарядки: 30 сек. Расход энергии: 26 | 28 | 30 | 32 Размерность урона атаки (% от физ. дд) : 100 | 110 | 130 | 150 Длительность жизнь монстра (сек.) : 10 | 13 | 16 | 23 Взаимодействие с параметрами: Дополнительная информация: Солнечное клеймо Накладывает эффект "Агрессия" на всех противников и отрицательный эффект "Стигмация" на нескольких противников в радиусе 3 ярдов от персонажа. При каждой успешной автоатаке по противнику с эффектом "Стигмация" персонаж или союзник восстановят здоровье в зависимости от магической силы персонажа. При этом с противника эффект снимается. Тип: Активный. По области вокруг персонажа. Время перезарядки: 14 сек. Расход энергии: 14 | 16 | 18 | 20 Длительность действия эффекта "Агрессия" (сек.) : 6 | 7 | 8 | 9 Размерность получаемой агрессии (ед.) : 15000 | 35000 | 80000 | 140000 Длительность действия эффекта Стигмация" (сек.) : 6 | 8 | 10 | 12 Размерность лечения от эффекта "Стигмация" (% от маг. дд) : 110 | 120 | 130 | 140 Кол-во целей для эффекта "Стигмация" (PvP\PvE) : 3 | 4 | 5 | 6 Взаимодействие с параметрами: Дополнительная информация: Натиск Перемещает персонажа к противнику с расстояния не менее двух ярдов, наносит физический урон противнику и накладывает отрицательный эффект "Замедление" на всех противников в радиусе 2 ярдов на некоторое время. Эффект уменьшает скорость передвижения противников. Тип: Активный. Одиночная вражеская цель. Время перезарядки: 20 сек. Расход энергии: 22 | 24 | 26 | 28 Размерность урона (% от физ. дд) : 130 | 140 | 160 | 170 Длительность эффекта "Замедление" (сек.) : 5 | 6 | 7 | 8 Размерность уменьшения скорости передвижения от эффекта "Замедление" (%) : 15 | 20 | 25 | 30 Кол-во целей (PvP): 3 | 4 | 5 | 6 Кол-во целей (PvE): неограниченно Взаимодействие с параметрами: Дополнительная информация: Внеклассовые эксперт навыки: Пассивные[30]: Активные[3]: Ссылки на полезные темы по Храмовнику: Храмовник by Komyban 2.0. Поиск себя на поле боя. [9.3.0]. Автор: @Onlypve X-Ray. Гайд на Храмовника 9.2.0: Полная информация и фишки персонажа. Автор: @Raymond Благодарность: Спасибо @Mucmp за замечательный шаблон для этого материала. Спасибо @Onlypve за гифки для новых эксперток, надеюсь ты не против)0)00)


 1 point
 -
 Друзья! Продолжаются праздничные события на Блаженном острове! На этой неделе помимо редких костюмов и учебника вас ждет сразу 2 награды и больше репутации в Подземельях. Изгнан был Серпентус с острова, но магия его никуда не делась, а наполнила собой старые школьные коридоры. Стены их холодны, неприветливы и вызывают неестественное чувство паники и страха. Этот страх поглощает учеников, которые ходят по школьным коридорам в одиночку. Никто не знает, как предотвратить это ужасное событие. Однако ходят разговоры о тайных книгах в Хранилищах Артефактов, книгах, которые могут помочь бороться с магией, которая продолжает жить, даже когда самого Серпентуса нет рядом. во все праздничные Подземелья добавлены костюмы "Серпентус" и "Жезебель Пляшущий Вихрь" (шанс выпадения увеличивается с уровнем подземелья); в праздничные Подземелья "Хранилище артефактов V", "Хранилище артефактов VI" и "Хранилище артефактов VII" добавлен редчайший внеклассовый учебник "Безудержная атака" (шанс выпадения увеличивается с уровнем подземелья); 2 гарантированные основные награды за прохождение любого праздничного Подземелья; в 2 раза увеличено суточное ограничение репутации при прохождении всех праздничных Подземелий. Время события: 19.04 14:00 МСК - 26.04 13:00 МСК Не забывайте про 50 призовых мест в праздничном Турнире по недельным рейтингам в категории "Пройденные праздничные подземелья" с невероятными наградами: 1-е место: костюмы "Серпентус" и "Жезебель Пляшущий Вихрь" и 100 Тайников Великого Магистерия 2-е место: костюм "Жезебель Пляшущий Вихрь" и 75 Тайников Великого Магистерия 3-е место: 50 Тайников Великого Магистерия 4-10-е места: 20 Тайников Великого Магистерия 11-20-е места: 10 Тайников Великого Магистерия 21-50-е места: 5 Тайников Великого Магистерия Время Турнира: 19.04 01:00 МСК - 26.04 01:00 МСК До встречи в игре! AIGRIND
 1 point
 -
Friends! An integral part of the School of Magic is diligent study. You will learn the basics of Illusion Magic and Animagic, discover new abilities and become stronger. Every day in the world of Arinar there are more and more great wizards who are ready to boast of a diploma in higher magical education! And we are sure that many of you will want to try on the role of a Teacher and create your own training material that will be used by warriors from all over the world! We are announcing the launch of the traditional annual competition of guides “Mystery of Wisdom 2021”! What to do? Write a guide or an article on what you are really good at. You can choose the topic yourself. A guide can be a general overview or dedicated to a specific direction, for example, PvP or PvE character development or fast character leveling during events. Let your imagination loose! And remember, 1 person - 1 work! What will we evaluate? The author's own style. Taking a ready-made beautiful template of a guide and making your own using it is not a bad idea, but unique author's touches in your work will be a plus, one way or another; Relevance, information content and practical use of the material. Try to choose topics that will be useful to more players; Accessibility of presentation. Guides are most often used by beginners who may not be familiar with the game or genre vocabulary. If your work is written in the simplest possible language and is understandable even for a child, you will certainly earn an extra point from us there; Presentation. An integral part of the guide is its appearance, namely text formatting, headings, structuring sections, using images, gifs, screenshots, etc. Take the time to beautifully present your creation. Do not forget to rate and comment on the guides of other participants, because everyone needs support and constructive criticism. During the competition, works can be edited and improved to perfection. Thanks to this, you increase the chances of attracting the eye of our juries to your work. It is prohibited to: use any materials that violate the rules of the forum; write guides on actions that violate the license agreement; deliberately publish of knowingly false information in order to mislead other players; plagiarise or copy existing guides. How do I get involved? you need to create a separate topic in this section of the forum and place your work in it; the theme should indicate the nickname and game server of your character, so that in case of victory, send you a prize. And most importantly, the awards awaiting the winners: 1st place: 10.000 miracle coins and 1 any classless skill manual of your choice (except for "Magic Resistance" and "Magic Extension") 2nd Place: 8000 Miracle Coins and 50 Seeker's Stamina Elixirs 3rd Place: 7000 Miracle Coins and 40 Seeker's Stamina Elixirs 4th place: 6,000 Miracle Coins and 30 Seeker's Stamina Elixirs 5th Place: 5,000 Miracle Coins and 20 Seeker's Stamina Elixirs Participation prizes are also possible. The most worthy works will be transferred and pinned in the header of the corresponding sections in order to illuminate the path for the young and inexperienced warriors of Arinar. Dates: The competition starts today, March 30, and will run until 23:59 on April 12, 2021, after which it will become impossible to publish a topic in this section. We will need some time to sum up the results, so we will announce the winners no later than April 16. May wisdom be with you! AIGRIND
 1 point
 -
В игре есть множество фракций и народов имеющих если и не отдельные острова то обширные территории, в то время как в распоряжении могущественной Вольной лиги находится лишь небольшой городок на севере Ирсельнорта Надир-сард с прилегающим к нему пепельным плато и экспедиционное поселение Зенет-хаф в Норлантских топях. Лор Вольной лиги раскрыт не так хорошо как хотелось бы, именно по этому я предлогаю добавить новый остров, родину Вольной лиги - пышущую жаром пустыню. По размерам остров примерно сравним с Ирсельнортом или немного превосходит его. Территория острова представляет из себя не самое дружелюбное место, в частности, по тому что большая ее часть покрыта песком, таящем в себе опасности и сокровища. Но пустыня это не только дюны и бархана, а ещё и глубокие каньоны. На побережье, где климат не так суров, а с океана дуют муссоны, земля более плодородная чем в центральной части острова, проживает большая часть людей, занимаясь: земледелием, скотоводством, ремёслами и конечно же торговлей. При передвижении по дикой части острова на персонажа будет накладываться негативный эффект "перегрев" (как потребление кислорода в 5 секторе) соответственно во избежании смерти от перегрева игрокам придётся применять на себя специальную солнцезащитную мазь (можно продавать за чм и за уникальную валюту у специального торговца), а так же специальное снаряжение по механике схожее с ластами и водолазным шлемом, например чалма или обувь с толстой подошвой. Так же для разнообразия можно добавить специальные песчаные бури с негативными эффектами, такими как замедление, бури будут появляться на случайных локациях что усложнит их переход (как газ во время гвг балагана 2020). Для более эффективного передвижения по острову необходимо обладать определёнными навыками (талантами). На острове находяться три города-государства, два из них конкурируют между собой за ресурсы и ищут союзников для вытеснения соперника, соответственно, за этим они и решили обратится к легиону и хранителям. Западный разослал контракты для найма эльфов и людей, а восточный горцев и проклятых. Третий, самый зажиточный, город Аль-Хазред находиться в центральной части южного побережья, продолжительное время занимал нейтральную позицию в конфликте запада и востока. Он настолько разросся что дальше уже было невозможно расширяться вширь из-за окружающих город непреступных скал, было принято решение строится в глубь, этому сопутствовало то, что остров имеет необычное строение, а именно большие пустоты. Их обнаружили когда на городской площади начали бурить скважины для добычи воды. Начав строительство подземной части города был установлен контакт с неизвестной ранее цивилизацией жизнерадостных гриболюдей. Гриболюди, по их собственным преданиям, в давние времена не могли никак двигаться и коммуницировать между собой, они росли в больших грибных рощах. Когда великое копьё было уничтожено и его осколки разлетелись по всему миру, один из них, упал прямо в грибной лес, он пронзал горные породы острова одну за другой пока не столкнулся с редким минералом из-за чего произошел взрыв не виданой ранее силы, образовавший пещеры и уничтоживший практически всю жизнь на поверхности острова, так и появилась пустыня, те грибные споры что смогли уцелеть, попали в новообразовавшиеся пещеры где под магическим воздействием осколка обрели разум и сформировали подходящие для перемещения тела. Они жили и развивались исследуя и заселяя новые уголки пещер. Но попавшая вместе с осколком кровь Гараана очернила разум и тело обитавших неподалеку от неё гриболюдей породив плесень - исконных врагов гриболюдей. Вольной лиге удалось войти в доверие и наладить торговлю с жителями пещер, начать поставки особого, редкого минерала добываемого гриболюдьми на поверхность, что сделало и без того богатый город ещё могущественние. Благополучие Аль-Харзреда не давало покоя соседям и вскоре они решили объявить войну.(можно добавить какай-то режим наподобие битвы за территории Ирсельнорта. Победившая сторона получит возможность попасть в город и получить необходимые для прохождения соло-инста усиления или же игроки смогут приобрести эти баффы у торговца в городе). Собственно это даже скорее не баффы, а навыки заменяющие основные и экспертные навыки игрока когда тот заходит в соло-инст. Пользоваться ими за пределами инста будет невозможно. Гвг-событие песчаный шторм (в разработке). по завершении гвг персонаж получит бафф который открывает доступ к соло-инсту. Соло-инст - при попадании игрока в подземелье характеристики его персонажа будут заменяться на иные, одинаковые абсолютно для всех игроков (останутся только бонусы внеклассовых учебников), это же касается и экипировки, она так же будет заменена на подходящее для класса снаряжение, не смотря на то что на палочнике будет одет тканевый доспех, а на танке тяжёлый характеристики у них будут одинаковыми. Что касается оружия, можно выдавать всем одинаковые пухи (как арбалет, котрый даётся по квесту на нубе людей) возможно даже стоит сделать так, что по мере прохождения инста, для определённой комнаты, игроку приходилось бы менять оружие с посоха на щит, двуручный меч и т.д. Теперь про навыки полученные ранее в битве или купленные у торговца, они могут быть атакующими, защитными или лечащеми (в зависимости от предпочтений игрока), соответственно любой сможет стань танком, хилом или же дд, а может даже и мульти-классом. Главным сокровищем, которое можно добыть в подземелье, будет оружие с уникальными характеристиками которых больше нигде нет (по примеру уникальных навыков из сета тритонов). Тема будет дополнятся. P.S я знаю что у разработчиков есть своя так называемая "дорожная карта" и наверняка они уже разрабатывают новый контент, я ничего не навязываю, просто хотел поделится накопившимися идеями.


 1 point
 -

Exibição de Habilidades em lacaios.
Arthas reacted to juliocesarneutron for a topic
×××Voltei com mais uma nova ideia, para ajudar a galera 👌, visto que eu e outras pessoas tem dificuldade em saber quais são as habilidades de lacaios evocados então surgiu a sugestão de pôr algo mostrando que Habilidades eles possuem, veja o exemplo abaixo: Assim o jogador saberia qual Habilidade seu pet possue e qual Efeito causa, enfim é isso, se houver alguma dúvida é só comentar abaixo! ×××Iai gente mereço ou não um traje do Grinch de brinde 😅. 1 point
 -

Актуальный контент без привязки ко времени
be a terorist reacted to акм for a topic
Персонаж без ги уже по определению не топ. Со всеми вытекающими последствиями. Даже с крутой точкой он ущербен. Тем более, люди со свободным посещением игры редко точатся на 10. Игра для них развлечение, а не задротство и смысл жизни. Но о них тоже нужно думать, слишком большой устроили перекос в пользу колхозников. Нахождение в ги не должно давать безусловные преимущества в силе и доступе куда-то просто по факту членства. На мой взгляд, это не правильно.1 point -
Ganha o prazer de ver uma sugestão sua dentro do jogo1 point
-
Interessante, gostei da sugestão.1 point
-
 Спасибо за руби 1книга скорости за всю неделю на горах и то нубо Шаму ,а были и челики которые набивали по 1к заходов ,а биж конечно валом было ,но колец физ авто опять мало. Просто спасибо за такой рандом1 point
 -
о наболевшем - PK
Shanalotta reacted to Джеmm for a topic
Ооо, ну ты попал судя по всему на время после битвы. Горы тогда в очередной раз победили и пошли громить афашеров в порту. Ну а нубы.. ну вы по пути попадаетесь, особо не вглядываются, кто там бежит и льют всех Плюс после битвы то и дело держут респу долгое время. Лучше в этот момент отойти, попить чаек, пока ваши афкашеры хайлвл все же не затащат. Это просто условный момент триумфа и победы. Так что на битвах и после пару часов лучше гулять аккуратнее И да, громить порт весело бывает1 point -
 Amigos! Os eventos do feriado continuam na Ilha Bem-Aventurada! Esta semana você receberá 2 recompensas e mais reputação nas Masmorras imediatamente, além de roupas raras e um livro de habilidades. Serpentus foi expulso da ilha, mas sua magia não desapareceu, ela preencheu os corredores da velha escola. As paredes são frias, hostis e emanam uma sensação antinatural de pânico e medo. Esse pavor consome os alunos que andam sozinhos pelos corredores da escola. Ninguém sabe como impedir que essa coisa terrível aconteça. No entanto, fala-se de livros secretos no Armazém de Artefatos, livros que podem ajudar a combater a magia que vive, mesmo quando o próprio Serpentus não está por perto. únicos trajes “Serpentus” e “Jezebel Dança redemoinho” adicionados a todas as Masmorras festivas (a chance de obtenção de item aumenta com o nível da masmorra); raro livro de habilidade “Ataque incontrolável” adicionado as Masmorras festivas “Armazém de Artefatos V”, “Armazém de Artefatos VI”, “Armazém de Artefatos VII” (a chance de obtenção de item aumenta com o nível da masmorra); 2 recompensas garantidas por completar quaisquer Masmorras festivas; Mais 2 vezes o limite diário da quantidade de pontos de reputação para a conclusão de todas as Masmorras festivas. Duração do Evento: 19.04 08:00 BRT - 26.04 07:00 BRT Como de costume, esta semana começa o Torneio de Classificação Semanal festivo na categoria "Masmorras Festivas Concluídas", onde você encontrará 50 lugares premiados com recompensas incríveis: 1º lugar: Trajes “Serpentus” e “Jezebel Dança redemoinho” e 100 Provisões do grande magistério; 2º lugar: Traje “Jezebel Dança redemoinho” e 75 Provisões do grande magistério; 3º lugar: 50 Provisões do grande magistério; 4º a 10º lugares: 20 Provisões do grande magistério; 11º a 20º lugares: 10 Provisões do grande magistério; 21º a 50º lugares: 5 Provisões do grande magistério; Duração do Torneio: 19.04 19:00 BRT - 26.04 19:00 BRT Vejo você no jogo! AIGRIND
 1 point
 -
Excelente! Realmente precisamos de mais guias sobre classes!1 point
-
Добрый день! Подобные предложения от игроков уже были на форуме, мы держим идею в голове. Со временем изменения в гильдии могут коснуться и склада, так что следите за новостями.1 point
-
best guide of the year!1 point
-
1 point
-
Great class guide for future good templar. Good luck to us 🙂1 point
-
Another good class guide. Good job 🙂1 point
-
.thumb.gif.4cb3a02e59265d0bdf9274324b07145b.gif)
Фанарт по миру Варспеар
mashunecka reacted to Sintem for a topic
Помню, помню.1 point -

Фанарт по миру Варспеар
Revolt reacted to mashunecka for a topic
Нашла вчера на старом ноутбуке. Выложу сюда, мб кто не видел. 😄

 1 point
 -
actually now that i think about it, maybe getting aura of hatred would be the best option, its boost damage increasing your curse damage(or any other skill you get later) as well as boost your defense, all in all a great skill if you gonna max it1 point
-
Hmm well, yea. I would've gone with Blood Protection. Try to give it a try. Sharp Shadow, I'm using it also on PvE. Stunning little mobs sometimes helps. But if your aim is damage and you're still uncertain, go for Hurricane as @Ogull said.1 point
-
if you are looking for PvE damage then take steel hurricane since it now deal damage depending on your most prevailing damage type1 point
-
Верно. У них ведь нет своей жизни и семьи. Они круглосуточно сидят и играют в варспир.1 point
-
о наболевшем - PK
Shanalotta reacted to Mrakoriz for a topic
В этой игре нет понятия ПК (player killer), тут слить красный ник священная обязанность каждого правильного легионера или хранителя. Вообще, я против того, чтобы гнуть игру под казуалов, иначе все это повторит судьбу ВоВ, только нам ваниллу не откроют Именно для этого мы и апаемся и точимся. Доминировать и уничтожать все что слабее. Тем самым создаётся мотивация выкачаться и отомстить "за уси обиды"1 point -
Dragon's Servant https://yadi.sk/d/ExgYa4fzeb3Vlg Dragon Charmer https://yadi.sk/d/WNYVhjXCS7Fy4Q

 1 point
 -

о наболевшем - PK
Leslie Nielsen reacted to Мelom for a topic
Вообще я давно задумывался про эту тему когда когда делал Стеллы Мстителя, Стоянки вообще не имеют защиты и охранники стоят там ради декора. Я лично вижу только одно решение, защитить стоянки Ирса более сильными мобами. Дать мобам ХП и силу как на 3-4 стоянках Айва. Чтоб нуб мог защититься застанив такого соперника а мобы в этот момент будут ему лицо ломать. А все что за пределами стоянок ну увы игровой момент. Ничто не мешает позвать на помощь Хай лвл чтоб тот убил его, ну или вариант 1 заманить противника на стоянку и пустить его под мобов. Когда мы бегали 18 лвлами мы реально боялись мобов Надира так как они сносили ХП очень бойко, а КВ Стеллы Мстителя или Трактат делался исключительно за счет умения сагрить стражу локи на что угодно но только не на себя. Надо восстановить те условия. @Holmes, дружище что скажите об этой теме?1 point -
о наболевшем - PK
Mooncake reacted to Shanalotta for a topic
Обходов и на ирсе хватает, сколько раз доводилось бежать в колиз в обход пританцовывая на переходах в то время как перед стоянкой был замес, и ничего, добегала, научилась чекать локу, смотреть карту заранее строя маршрут, пристраиваться к бегущим хаям.) А если новичок уперто выбегает на локу где его ждут, значит надо еще пострадать, пока не придет мысль о поиске обходных путей.) И потом, в каком это таком количестве? Я сейчас могу твином пробежать весь ирс и мы можем посчитать сколько раз меня сольют. Я лигу проходила последнему твину, проблема возникла только на 1 рб в виде 20 аренера фул вела +10 и его друзей, и мы перенесли прохождение на следующий день, и прошли на следующий день спокойно, в общем лига была пройдена в течении суток в свободное время на расслабоне. И в то же время я помню как вели лигу моему самому первому персу, лет так 6-7 назад. Ги сообщалось что нужна лига, человек 10 хаев с ги за 3 часа смогли провести только 2 рб, через 2-3 дня был собран отряд из 20-25 человек и приглашено человека 3 знакомых аренера, и вот этим составом мы осилили еще 2 рб, на одном юзался даже инвиз ги, остаток проводился примерно так же, даже на страже был замес, лига отняла более недели. Я понимаю, вроде как что то что мы страдали не значит что должны страдать они и все такое, пусть наши потомки живут лучше нас... Но куда еще то лучше и проще? Тут уже только полностью пвп убрать осталось.1 point -
Однозначно прав. Предлагал я как-то лавочное зелье для лоу лв, после принятия которого полученный ими урон от хаев отражался и возвращался к хаям в двойном размере, если хай ударил первым. Но ток в случае, если разница в лв составляла бы 5-10+ лв. И разумеется, не работающее во время битв. Или штрафы можно было бы придумать за убийство детей, хз, вариантов масса. Единственно что, продумать все нужно, дабы Ирс не наводнили неубиваемые твины 3лв. Действительно, когда на Ирс попадали на 12лв, а максимальный был 15-18, все было ок, и стража сильная, и дойти до чужого порта проблема. Но прошло больше 10 лет, и ничего не изменилось, кроме того, что теперь по Ирсу гуляют 32лв, убивая перекупов от скуки и гоняя квешников, и уже совсем другая там атмосфера. Эту проблему нельзя списывать со счетов, ограничений по дропу мало, нужно, на мой взгляд, что-то придумать дополнительно.1 point
-

Analise da skill do escudo de templario erro?
Christianps reacted to Khrone for a topic
Exato1 point -
Рандома в варспе стало настолько много, что он вылился в реальность.1 point
-
i am amazed at how this class preform well in PvE, its capabilities to recover damage, its skills to absorb/reduce damage while at the same time buff the team and be a support and a tank, really such a strong class... that or i am over evaluating it because i am a death knight this is interesting, i didn't think about the idea of damage reduction increasing scared shield longevity, with the 32 armor set... really this skill get more impressive the more i know about it oh i almost forgot, great guide1 point
-

Arena 2v2 Br-Tourmaline
Pokerface reacted to Edushemala for a topic
1 point -
Дальше вампа тож не осилили?1 point
-
New set of "Servant of the Dragon" stickers»How do you like it ? Do you want to try them ?
 1 point
 -
Приветствую, недавно задался вопросом, что не так с "Выдохом мрака". Если следующая после каста скилла атака уходит в дф стат, такой как Уклонение, Блок или Парирование, то эффект с персонажа пропадает. Аналогичная "Волчья прыть" Вождя и схожие "Знания мертвеца" Заклинателя так себя не ведут, и покорно висят, дожидаясь следующего тычка. Уважаемый @Holmes, хотелось бы узнать, так ли это задумано, или это следствие устарелости механик и можно надеяться на фикс.1 point
-
Сегодня навыки из себя представляют следующее: вытяг уходит в уклон/блок, лужа уходит в сопру. Для меня оба факта бредовые. Что есть вытяг? Это проклятие. Дак как им можно промазать? Намного логичнее, что бы как раз оно уходило в сопру. Что есть лужа? Это по сути аналог дождя некра(более слабый аналог), но зачем то она дебафает противника и он получает шанс увести её в 0. По моему как раз таки сдесь должен работать уклон, а не сопра(блок работать не должен, не на щите же по луже плавать во время боя). При чём уклон должен идти на каждый тик, а не лужу в целом(прыгай рога, прыгай). То есть получится некий обмен между скилами. Что это практически решит? Это комбо от увяда. Что оно из себя представляет сейчас? Это одиночный 4-х секундный стан(на фул), который может уйти аж в 3 сопры(увяд, лужа и сам стан). То есть шансов у противника просто море. Считаю для одного стана слишком жирно. На этом всё1 point
-
1 point


.thumb.jpg.43348ed77211da71878a0747067a410c.jpg)